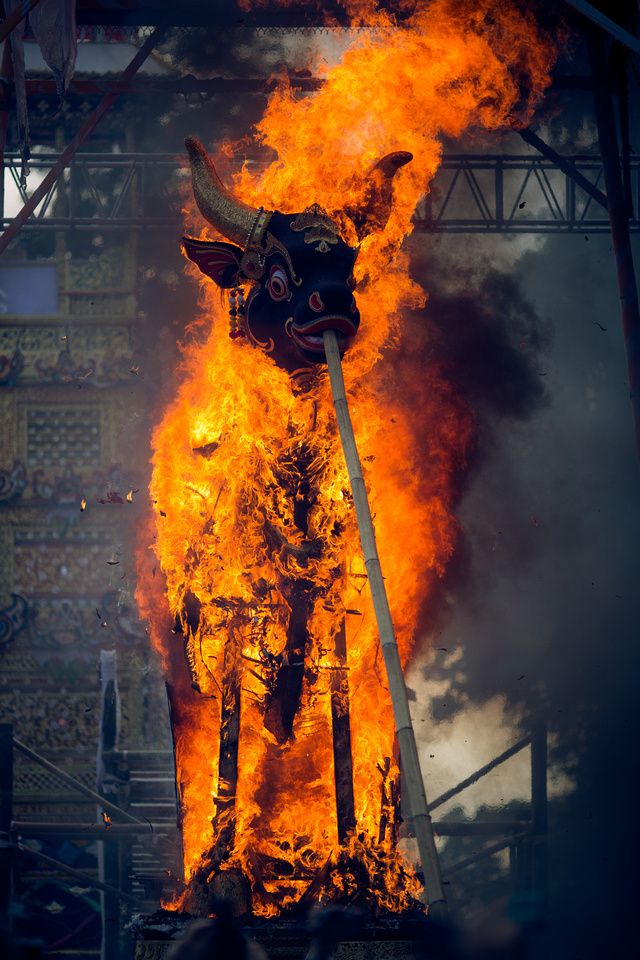
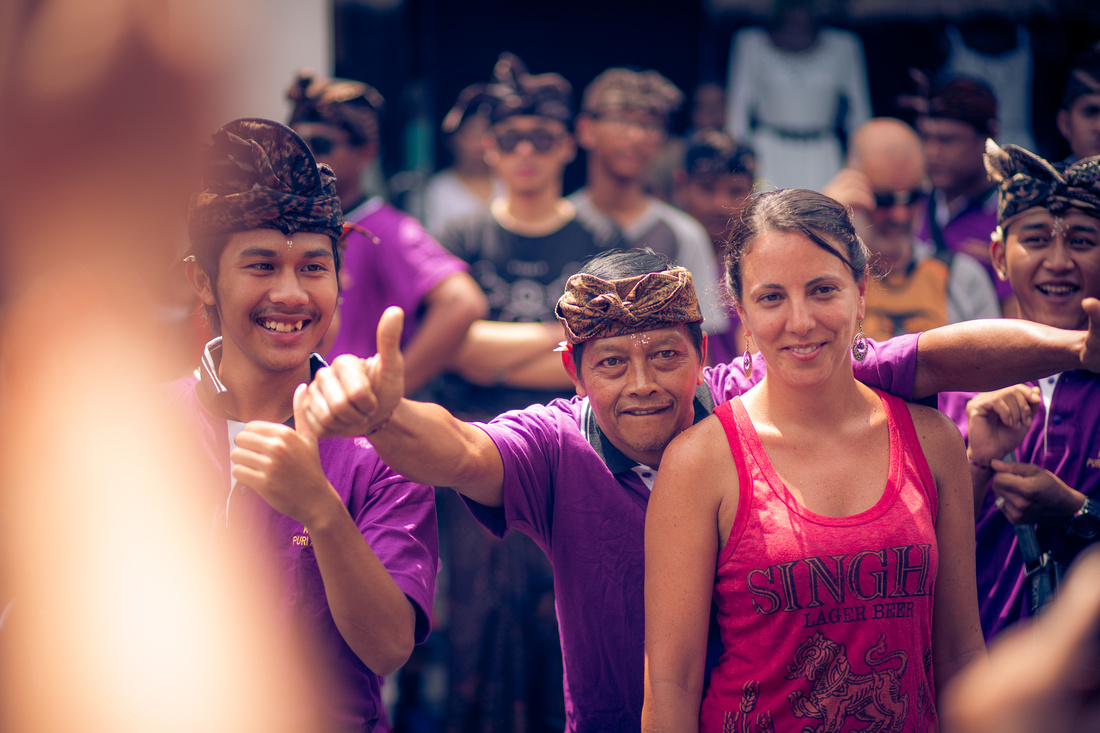
 I was in Ubud for a rare occasion, which was a cremation. Cremations are rare because they are public events that cost a lot of money and families save up for years to be able to cremate their loved ones. However, in this case this was the cremation of the prince of Ubud and his family were able to afford to cremate him. The prince was only 34 years of age and tragically died of an asthma attack. However to the Hindi populace this is a celebration as he gets to pass on to a better world sooner and thousands of people came to celebrate.
 The prince's body was carried from the Palace to the cemetery around a 20 minute walk under normal circumstances, however, on the day of the cremation there was a procession and teams of devotees carried a bull and and a tower, housing the prince's body. The bull would be the final resting place for the body where it would be transferred to and later burned.
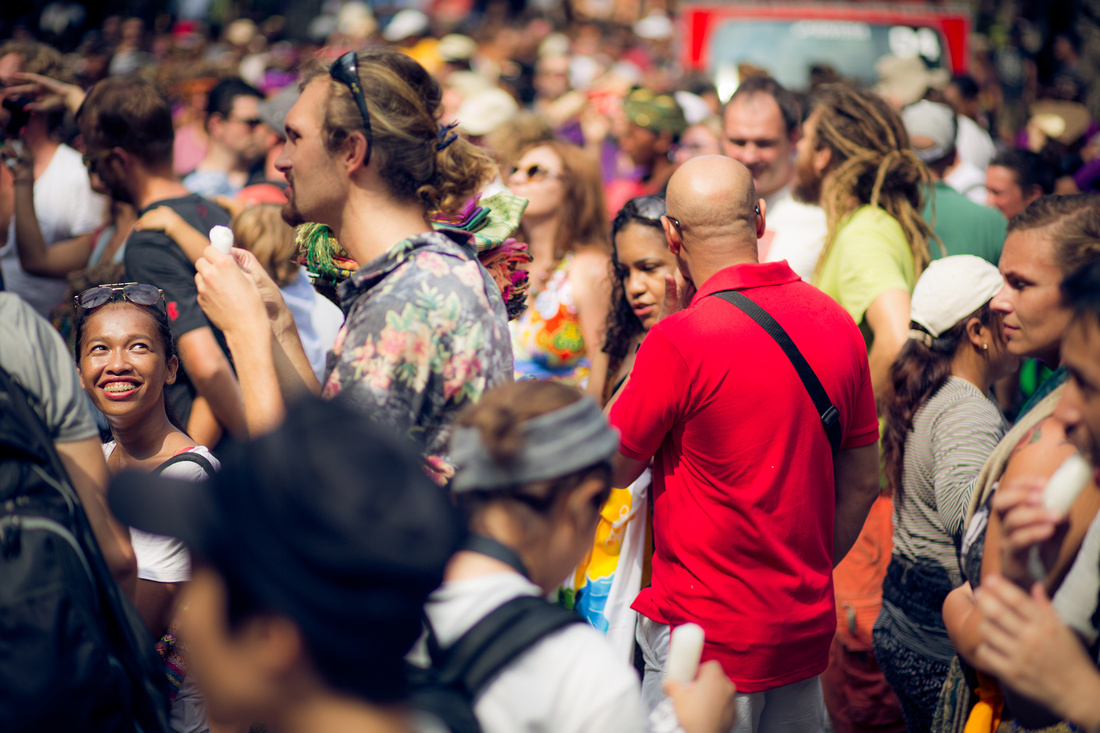
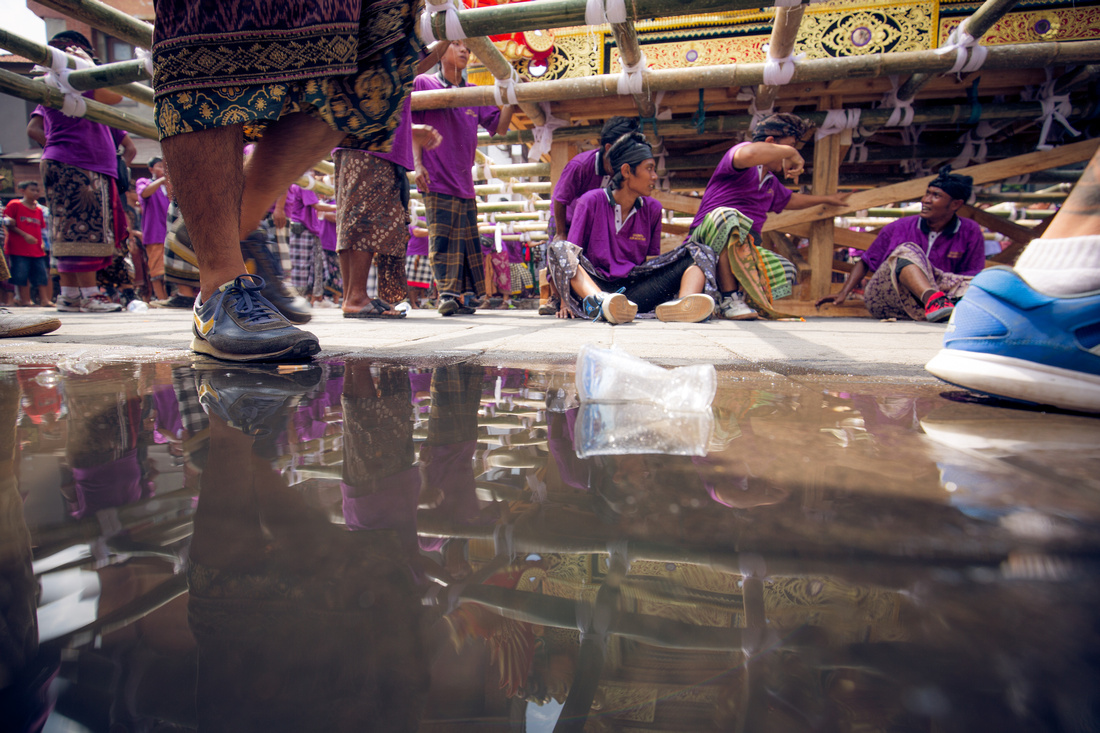
 These mobile monuments are heavy, really heavy and teams of people took it in turns to carry the structures in a relay through the streets of Ubud. I was lucky enough to have staked out a spot with a few friends in a local restaurant on the main street in order to be able to have a good vantage point of the precession as it went past. I had been told that thousands of people would be attending the celebrations and I was fortunate to be staying local enough to book a table earlier that morning so that I could capture the people as they came past.
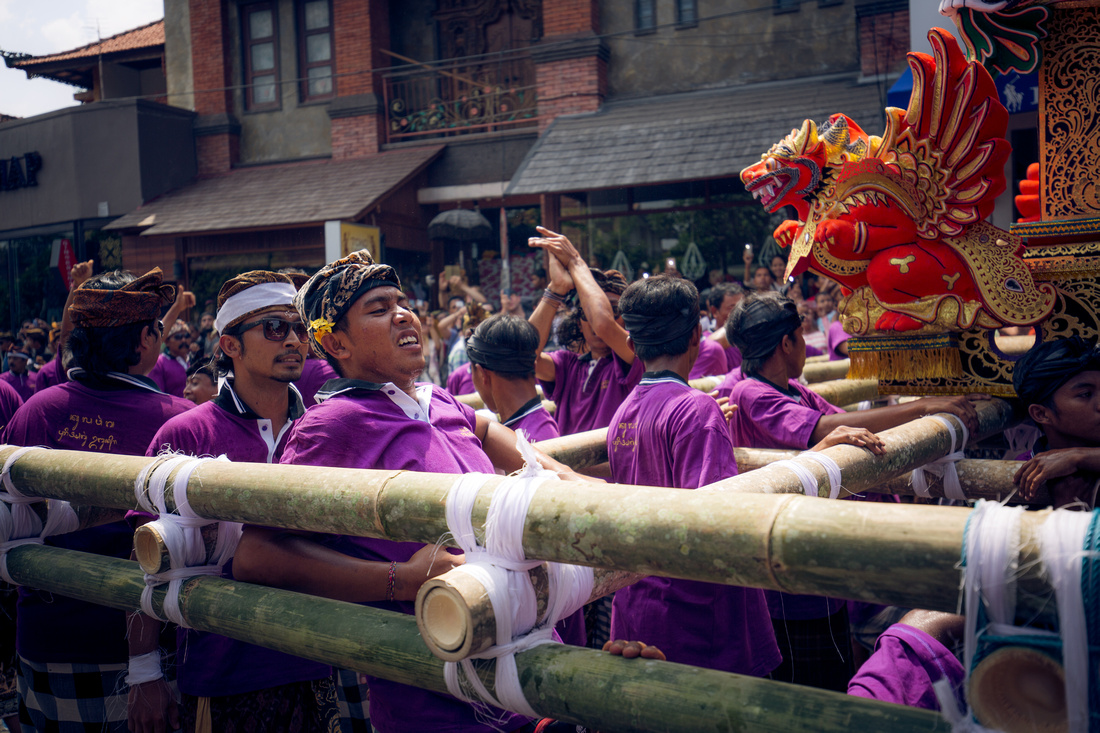
As the procession winded it's way to the cemetery their were a few pit stops along the way to allow the bearers time to rest. The structures were extremely heavy and the precession took place at the hottest part of the day, meaning that these breaks were essential for those carrying the monuments.
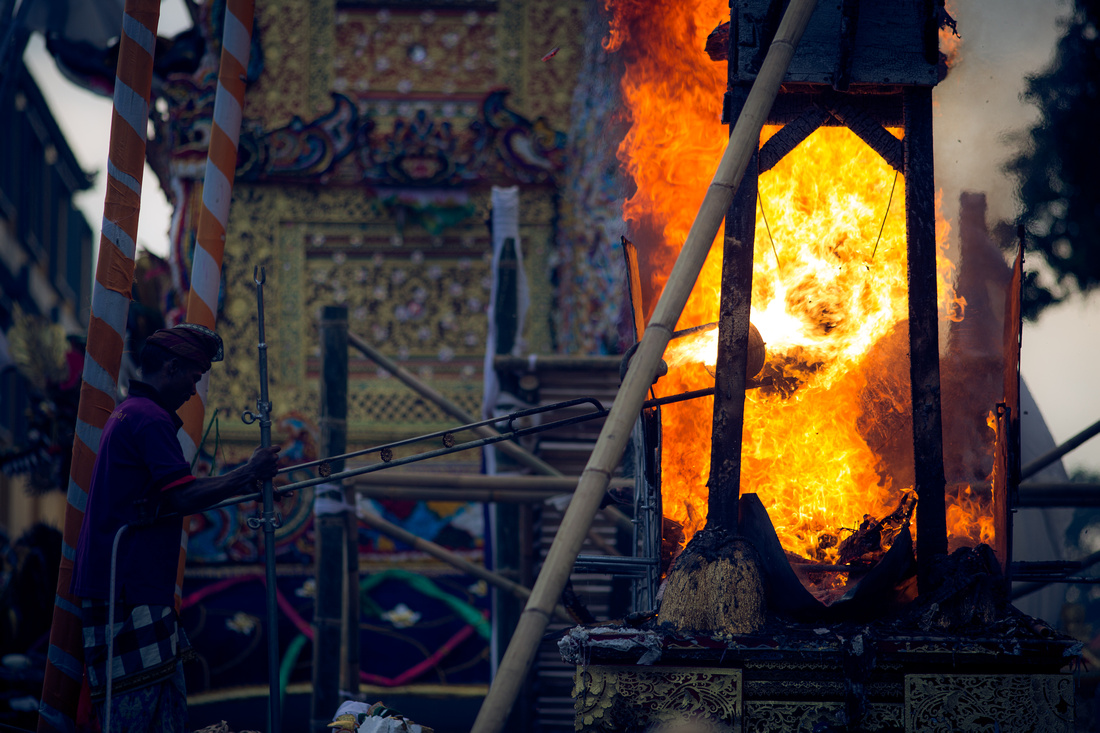 At the Cemetery the body was burnt signifying it's passing to the next world, there was a celebration and people were clapping, this is in contrast to the western cremations that I am used to where the mood is somber. I am certainly not used to people selling me pringles and beer or hear cheering as the body is being burnt. However, I can't help but wonder if this is not a more healthy attitude towards death.
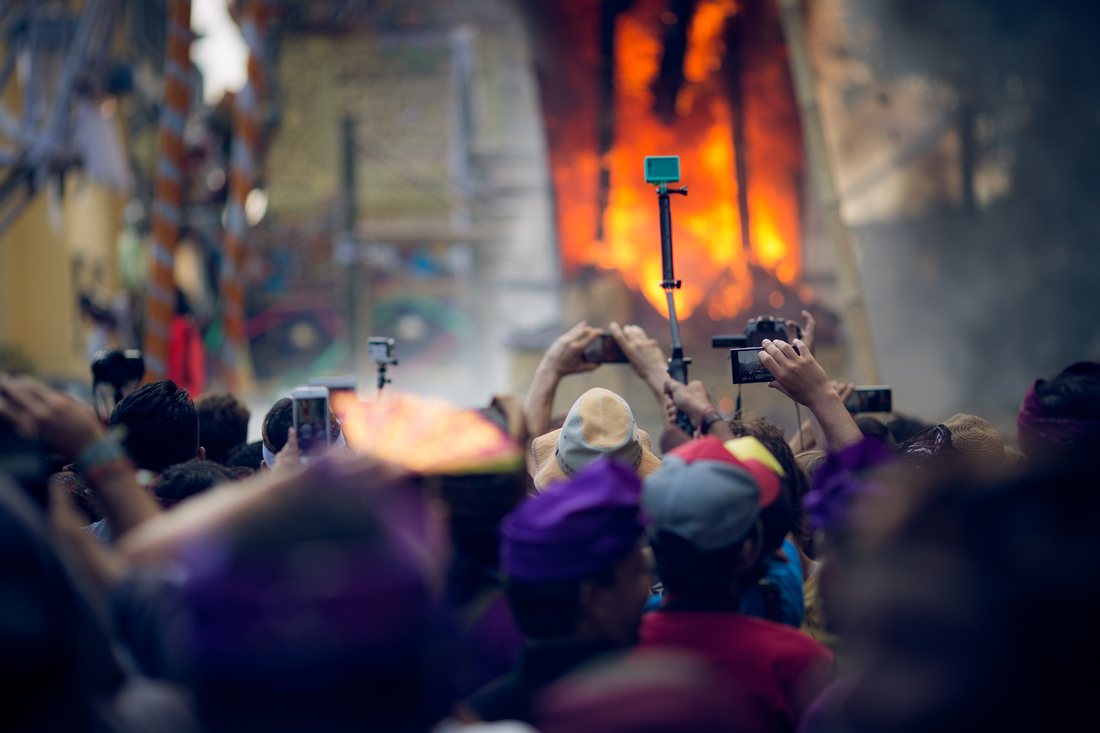
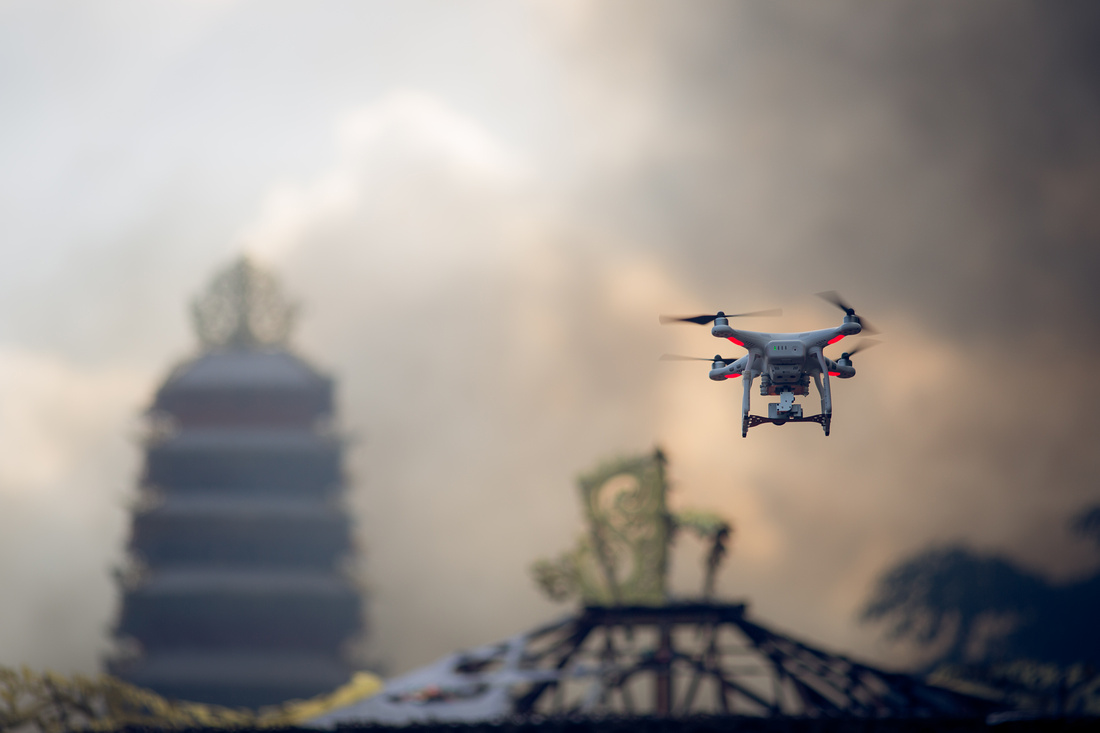 The event was well covered by the media and by people who wanted to have their own document of the occasion. I was grateful of the opportunity to experience a royal cremation from the local prospective. It felt like I was a part of their history which was being written in front of me and so many people were there ready with their camera's and phones to record the day for themselves.
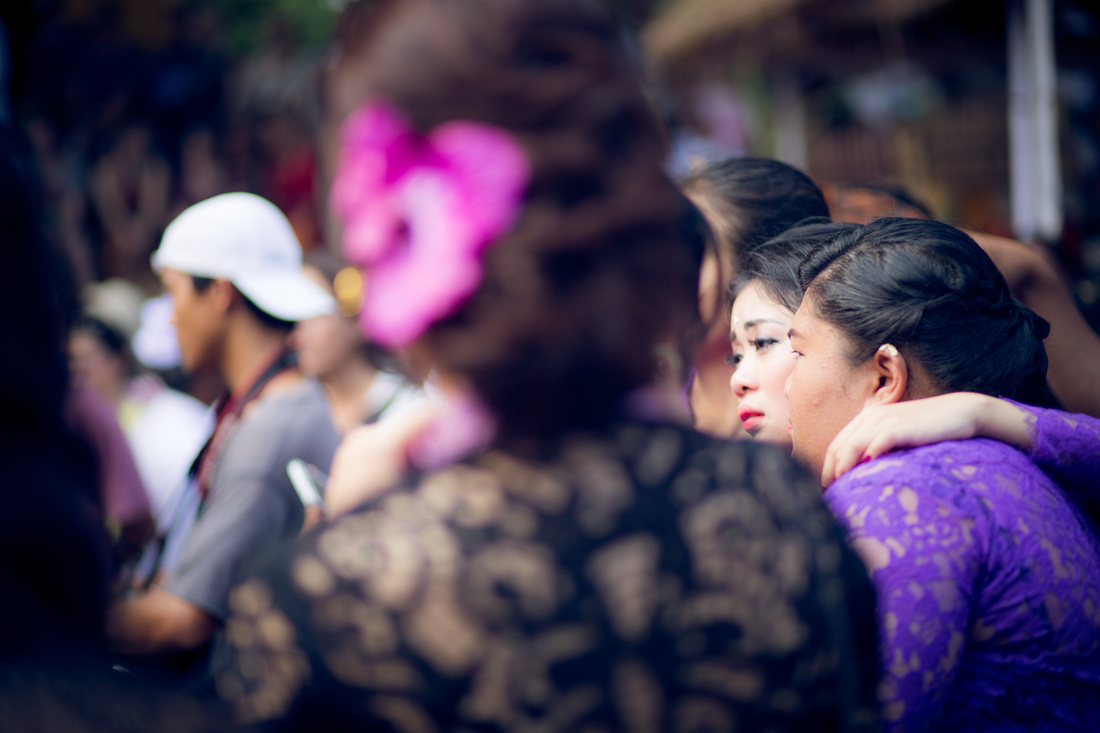
 I was told that in Balinese culture people do not cry over the body as this will prevent their passing to the next world, instead they rejoice and celebrate the passing as a blessing. I like this idea and feel that it would help me in coming to terms the death of a loved one. I was told that the prince was a very popular man and I did see a few tears away from the body but mostly I saw happy and jubilant people who banded together in their celebration of this man's life.
Please click here to view the full gallery.
]]>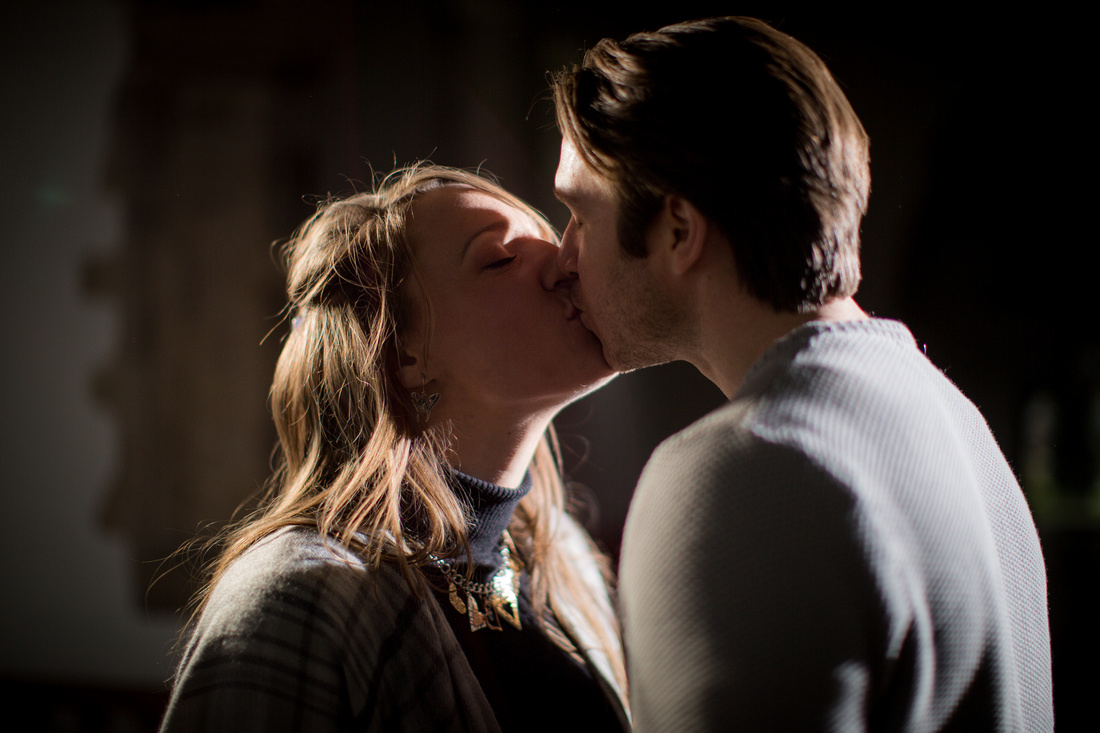
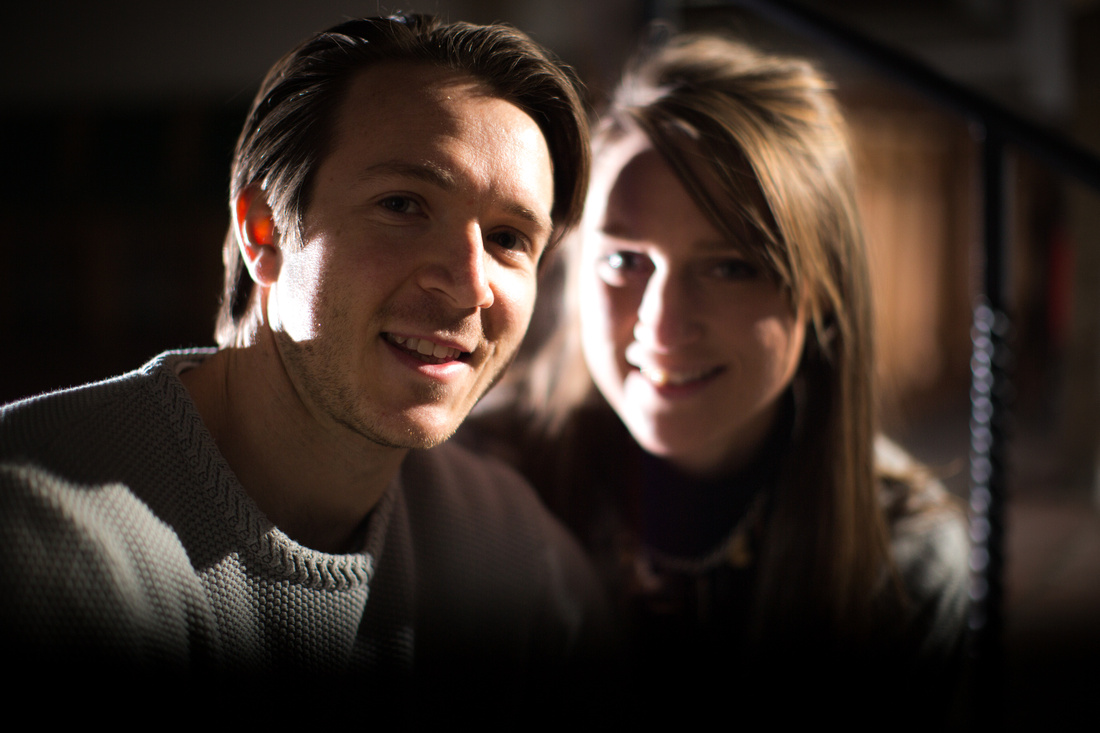
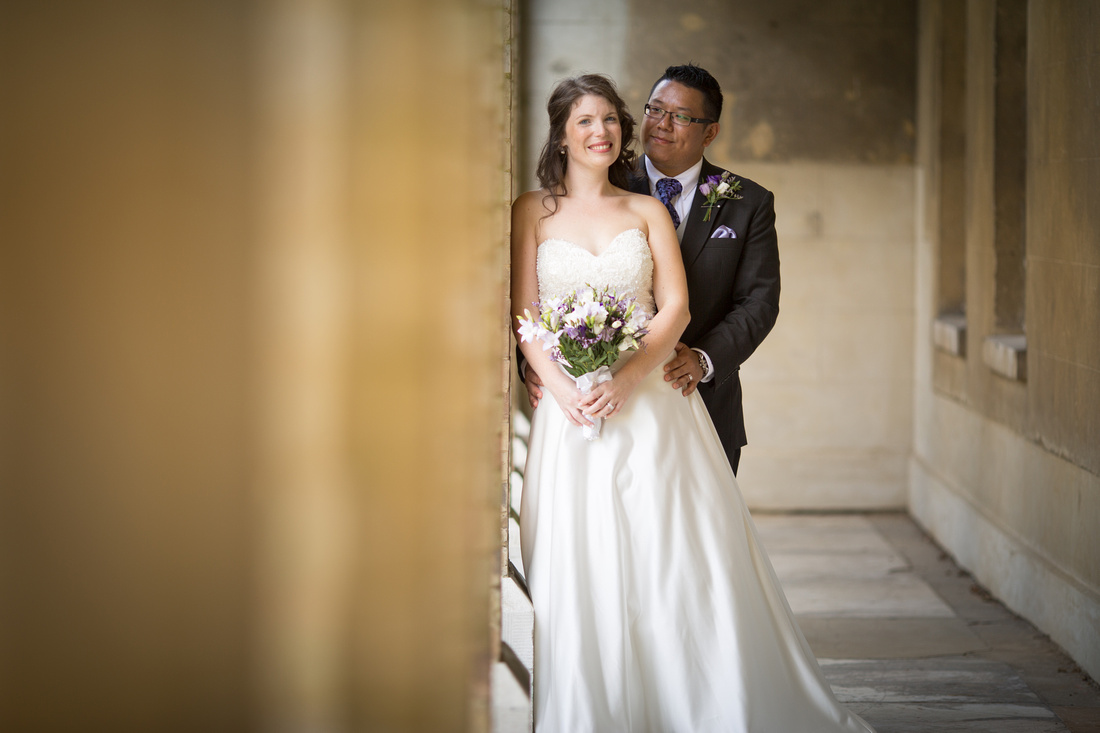
So I was the wedding photographer for friends of Corinne and Danny a few years ago. In fact this was my first wedding and I was little nervous to say the least. Danny was the best man, which made my life so much easier, he is a very organised and positive person who was able to keep the groom and his party in check and also help corral all of the guests at key moments. Corinne, herself a wedding photographer very kindly offered to do some second shooting for me and imparted much needed advice from her experience having shot many more weddings than my humble none. However, you have to start somewhere and fortunately for me the photos were a hit so much so that Corinne and Danny chose me as their wedding photographer some 2 years later.
I met Corinne and Danny in Eynesford, which is a place that is special to them. Corinne’s mother was the warden of St Martins, the local church. Corinne and Danny chose to get married at St Martins for this reason; furthermore Corinne’s mother is a priest and she is going to marry the couple, how cool is that?
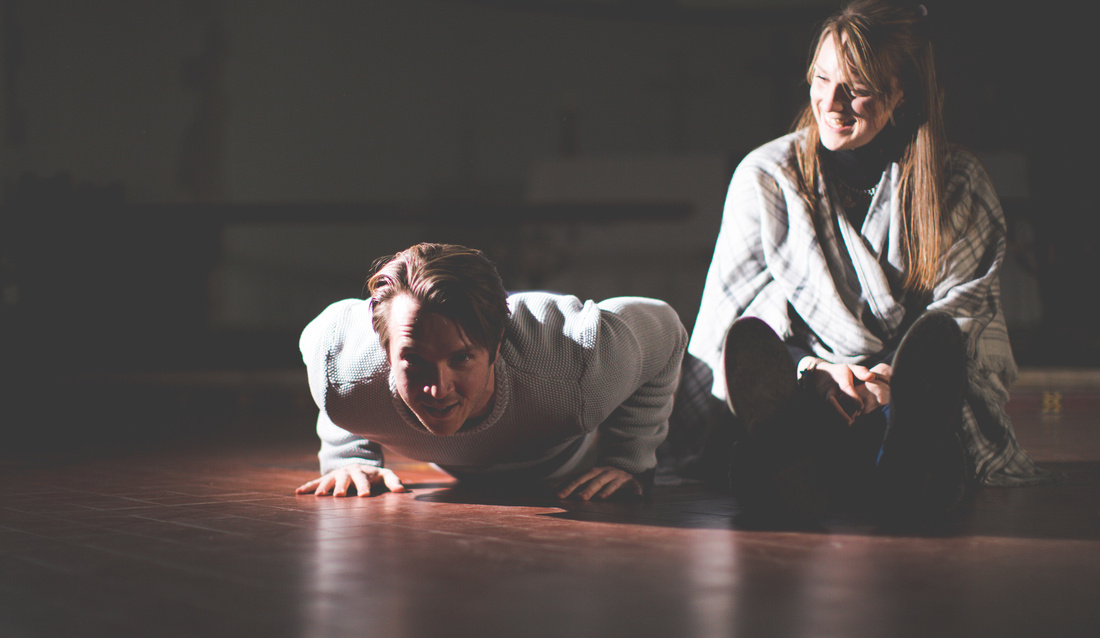
Corinne arranged for us to have exclusive use of St Martins. I initially felt a sense of guilt and uneasiness parading around a church with cameras and lighting stands added to this I was trying to capture some tender more intimate moments between Corinne and Danny. However this felt a little awkward given that we were, after all in church. Danny once again came to the rescue by doing push-ups and demonstrating that whilst we were on hallowed ground there’s always room for a push-up or two. I now had a good idea about where the boundaries lay in this particular church and felt instantly more comfortable.
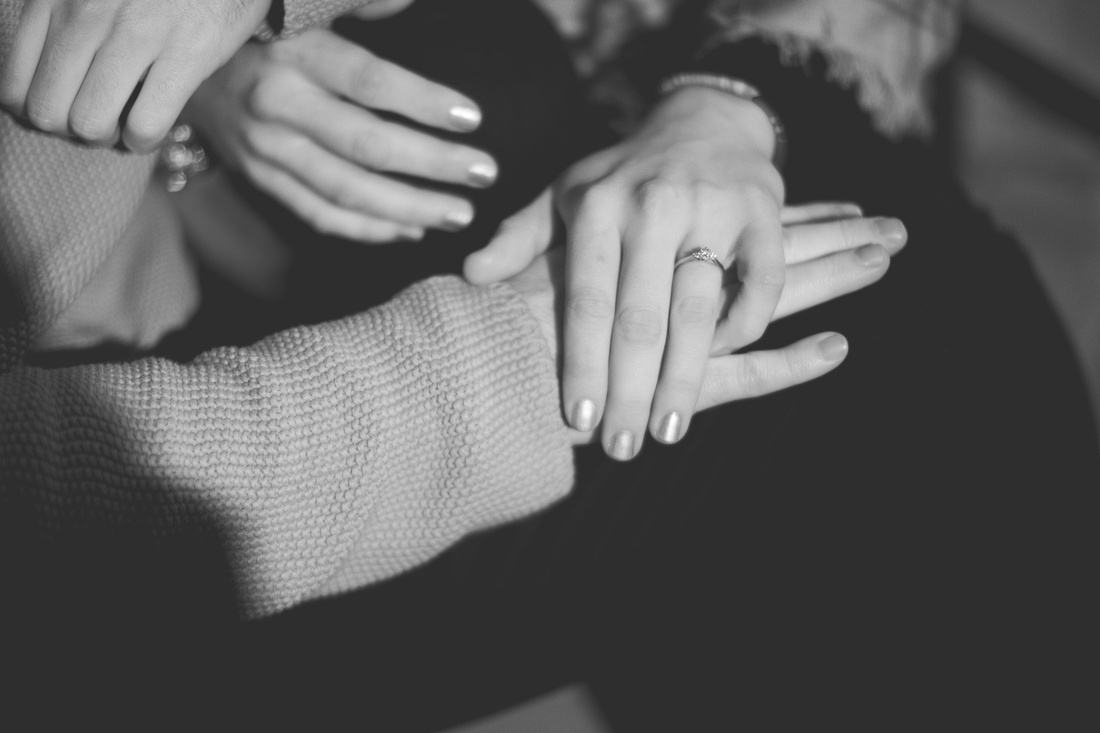
Corinne told me that she used to sing in the choir at the church and explained that her late grandfather played the organ there for 28 years. She said that when she took Danny to meet her grandfather he told her he would like to play for them at their wedding. Sadly he can’t be there with them on the day, however, he did record a wedding march which Corinne will walk down aisle to. The acoustics in the church are amazing and will really bring his music to life.
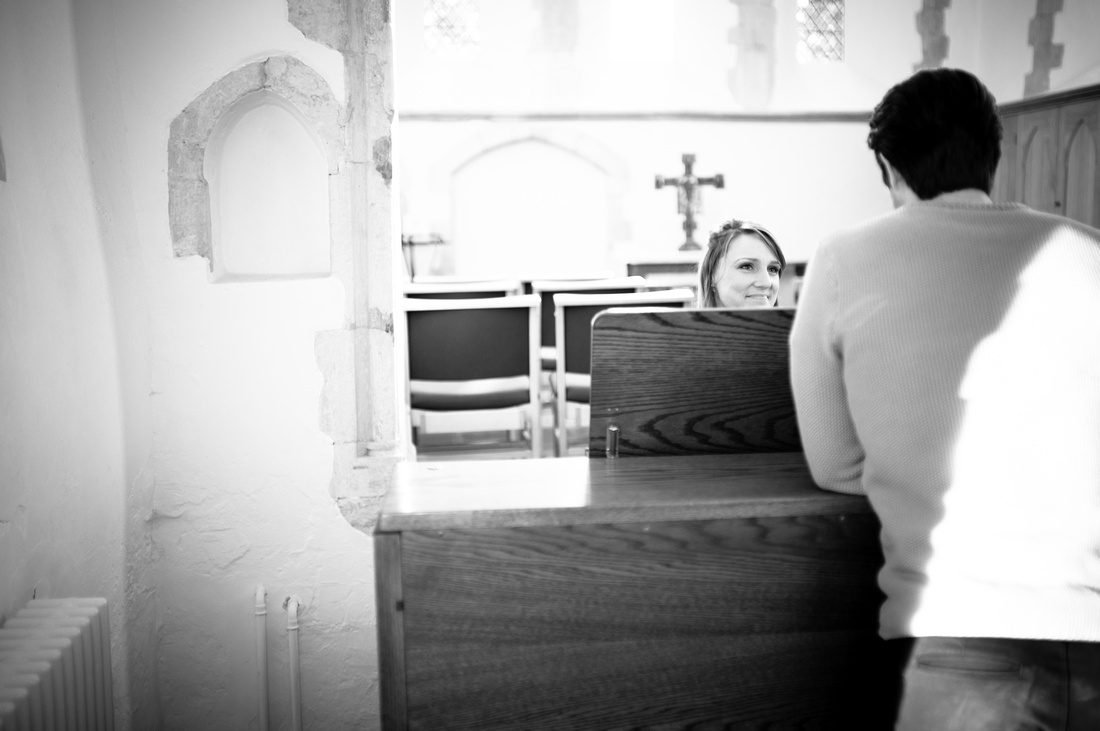
I put the acoustics to good use by playing some music for Corinne and Danny to dance to, this was a piece that is a strong contender for their first dance so they were able to practice on the central floor in the church which, made a good spot for an intimate sway. The couple were able to forget about me for a while and concentrate on each other, highlighting their fun and romantic sides.
Corinne told me that she was really keen to have some photos taken by the ford, which, along with the river is one of the main features of Eynsford. This was a little tricky as I wanted to use a wide angle lens meaning that I would need to be close to the couple, therefore in order to frame the shot well I needed to stand in the ford. I took on a bit of water but it’s all about getting the shot!
We did some shots outside by the river as well, giving Corinne and Danny a chance to relax and mess about.
As the light went down I was able to capture some more tender shots of the couple as they cuddled up together to keep warm due to the dropping temperature.
This engagement shoots marks the countdown to Corinne and Danny’s wedding who were a fantastic couple to work with and I’m as excited as they are about the wedding day. I know it’s going to be great day and I feel especially honoured to be their photographer. Having got to know them better I realise what a great couple they are and I wish them all the luck in their new lives together.
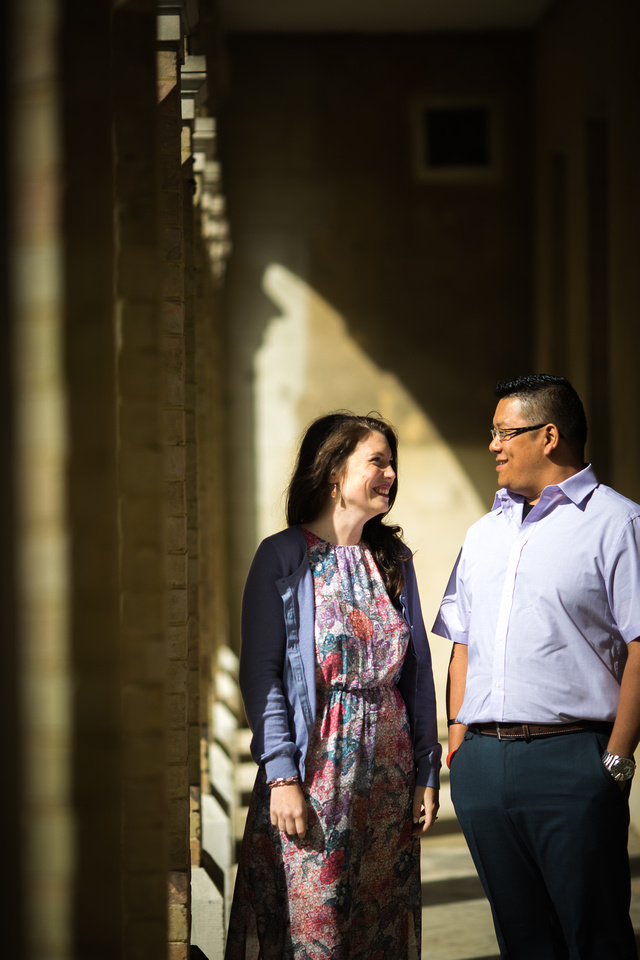
 Amanda and Jamie will be getting married in the spring at the Old Kent Barn which is a beautiful venue with a rustic and warm vibe. I met Amanda last year when she chose me as her wedding photographer and I was keen to meet with Jamie so the photo shoot gave me the perfect opportunity to get know him and them as a couple. Amanda and Jamie are a very warm and loving couple who are excited about their upcoming big day however, Jamie was like most grooms to be, in that he was reluctant to have his photo taken.
 For this reason I recommend that all couples have an engagement shoot prior to their wedding so that they can get used to the camera and get to know their photographer before the big day. In this case the engagement shoot took place at the wedding venue allowing me to have a look around and pick out the prime spots for photos on the day ahead of time.
As the shoot progressed Amanda and Jamie became more relaxed which was helped in part by the acoustic music that was being pumped around the whole complex through speakers, some of which were cleverly disguised as rocks. I loved this idea and wished all venues would do this as it really helped to create the perfect ambiance for the shoot.
 There are several areas to the venue and we were lucky enough to have the run of the whole site as did their resident cat, who was very cute and attentive following us around the Old Barn part of the venue while we were in there. Eventually retiring under one of the beds but not before attacking the stair case for no apparent reason other than pure entertainment and malice.

Despite the cold and bracing wind Amanda and Jamie were really good sports and allowed me spend time with them outside in the beautiful grounds at the Old Kent Barn. Whilst not ideal the cold at least meant that cuddling was necessary in the prevention of hyperthermia, making it easier to get shots of tender moments between them.
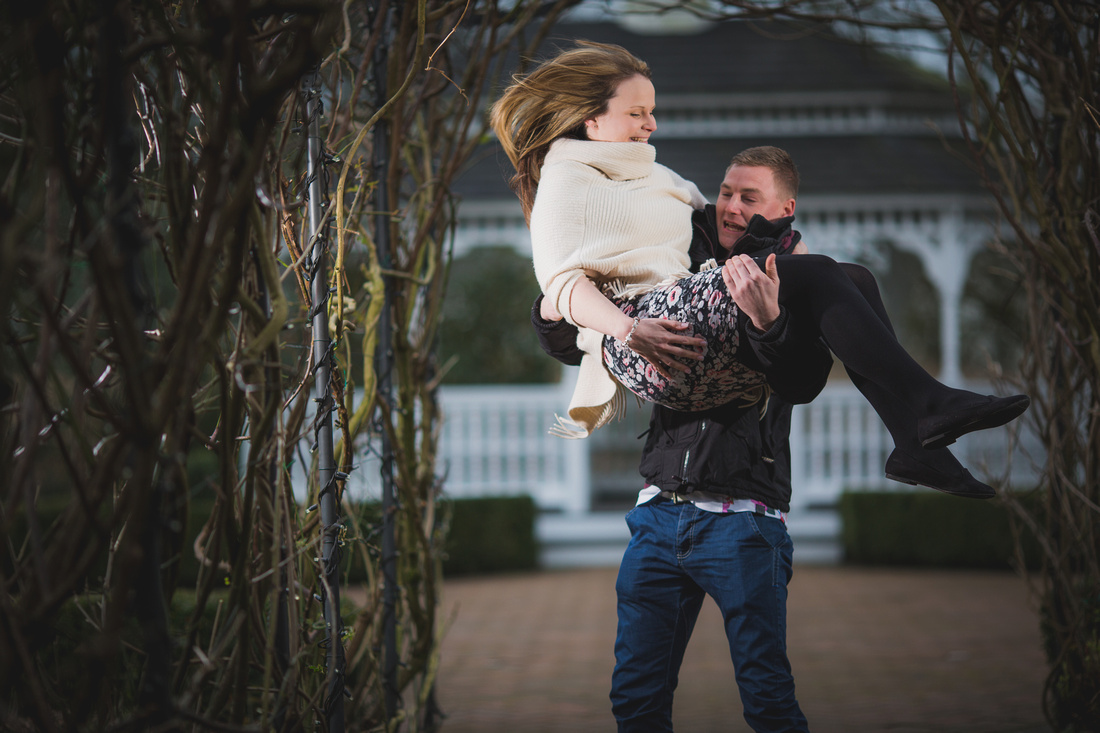
 Amanda and Jamie have a playful side which, I was keen to show in their photos because I think it depicts them as a couple and I want this to come through on their wedding day. It is always very difficult for a couple to be spontaneous in front of a camera so I suggested that Jamie pick Amanda up. I didn't realise that this was the first time that he had done this but kudos to him as he did it like a pro and Amanda appeared to be very comfortable being picked up.
 Amanda and Jamie really got in to the shoot and I feel that I was able to get some shots of them which are individual and depict them as a couple. I am sure that they will have a fantastic day. I am so excited to be documenting it for them as they are great couple who I have already enjoyed working with immensely.
]]>
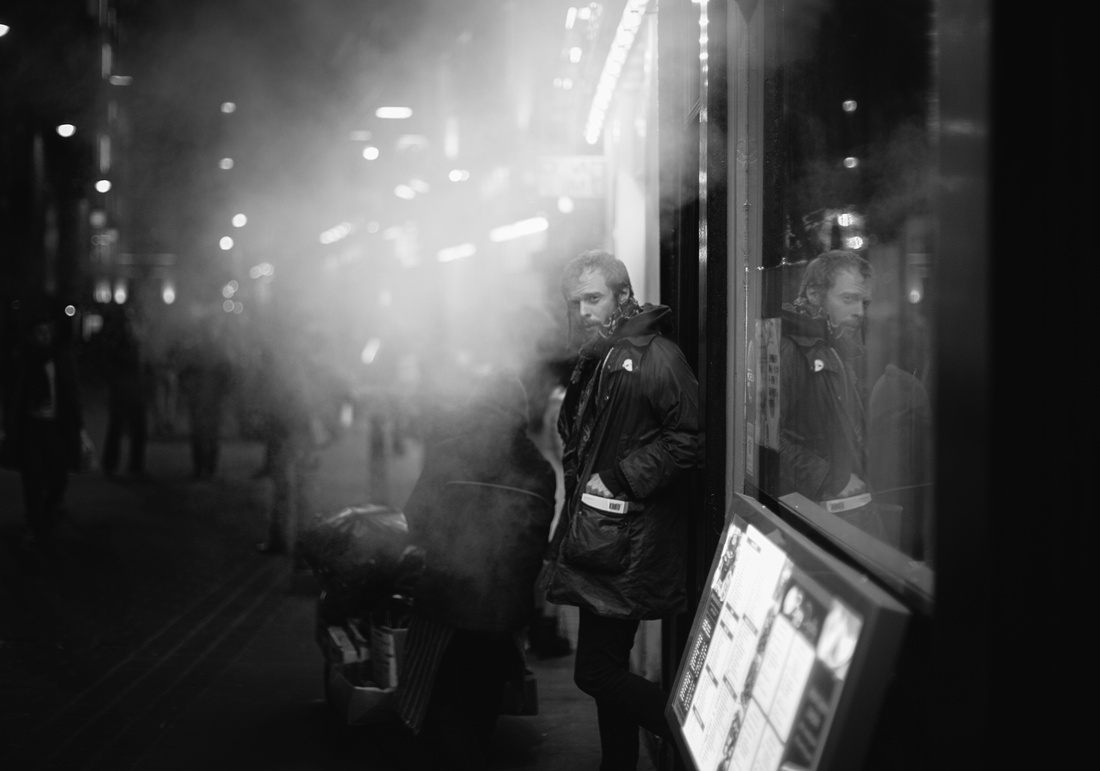
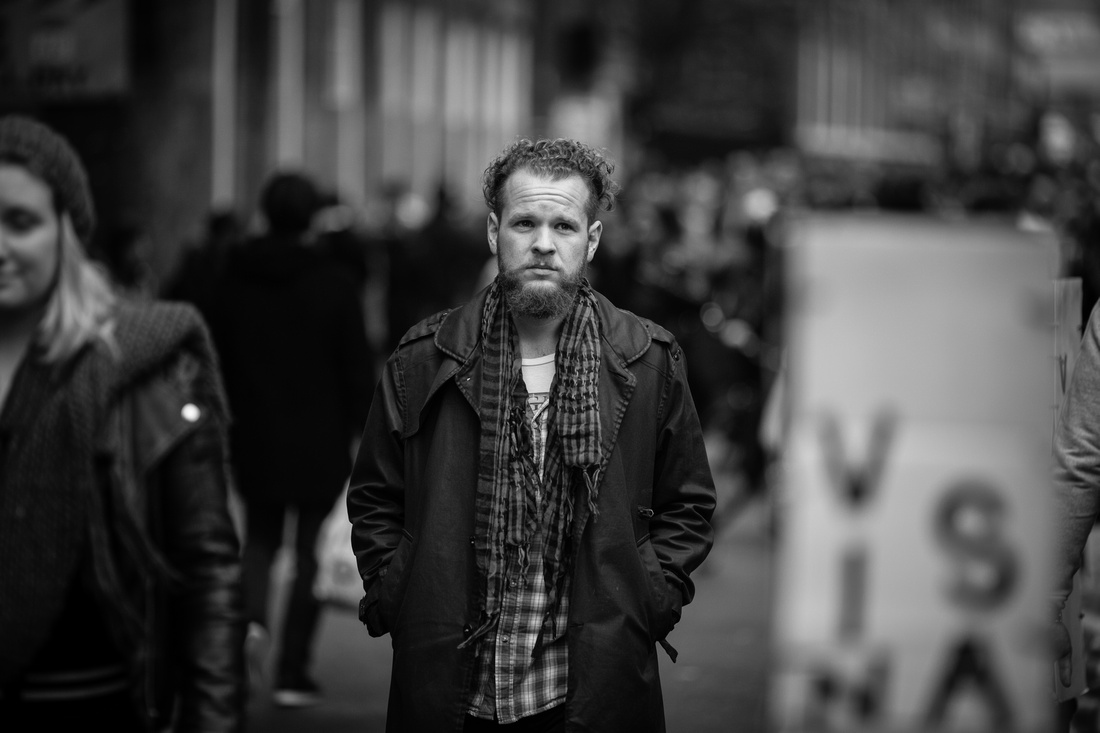
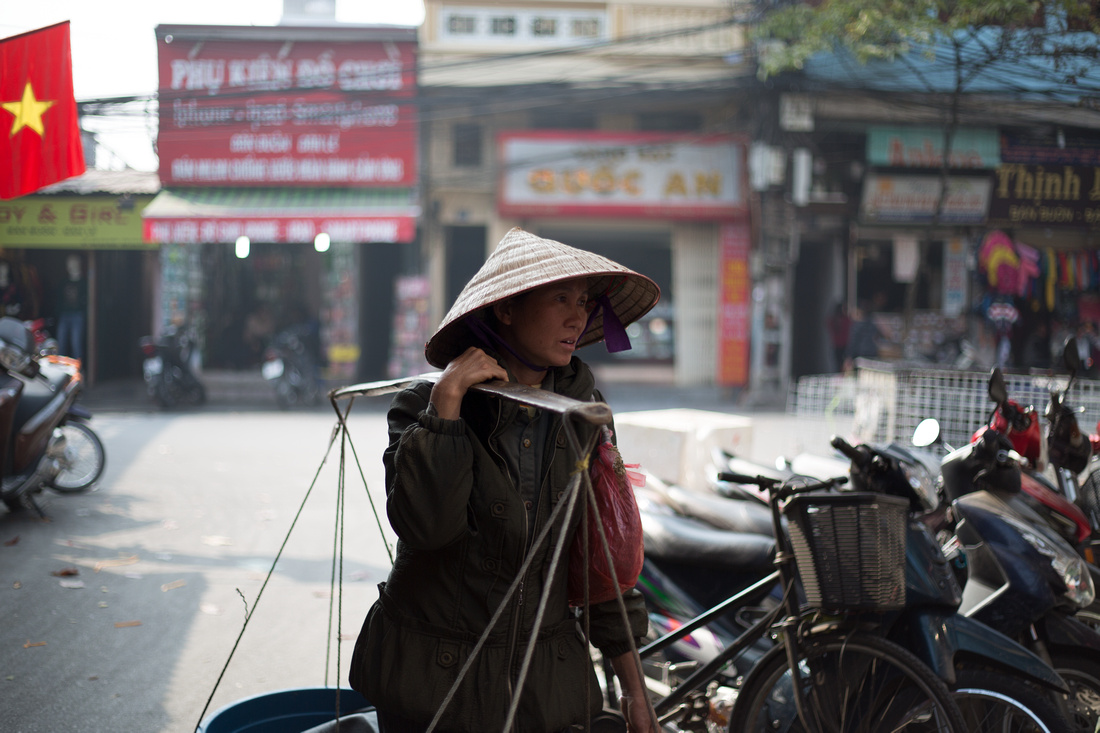
What is street photography?
For those of you who don't know what street photography is, you are not alone as it can be pretty difficult to pin down exactly what it is, street photography means different things to different photographers. Most people agree though that photos taken on the street count and the definition of street is quite loose. For me street photography is more about taking candid or chance photos of events and moments that are not staged or forced.
My thoughts on street photography
I shoot street photography to relax I love not knowing what subjects I will find when I go out to shoot or what will grab my attention and capture my interest. I know that I am never bored when I'm walking in a busy area and have a camera in my hand. I find that the spontaneity and randomness excites and focuses me to take photos that I find interesting.
 I hope that if I am curious about what is happening in a scene or if I want to know more about a person then the chances are that the viewer will also wonder about the same things and appreciate what interested me to take the photo. Sometimes I am drawn to the action that is happening in that moment or to the interactions of those around me. I really enjoy showcasing the best of people so I like to photograph poignant moments and will tend to look out for them.
I think Street photography is a valuable art form, it acts as a social documentary through the eyes of the photographer. I am not claiming to be a great photojournalist or street photographer however, my photos together with those of many others help to shape the way in which future generations will see us. We are very lucky in this day and age as we have more ways to document our lives than ever through the aid of social media and smart phones.
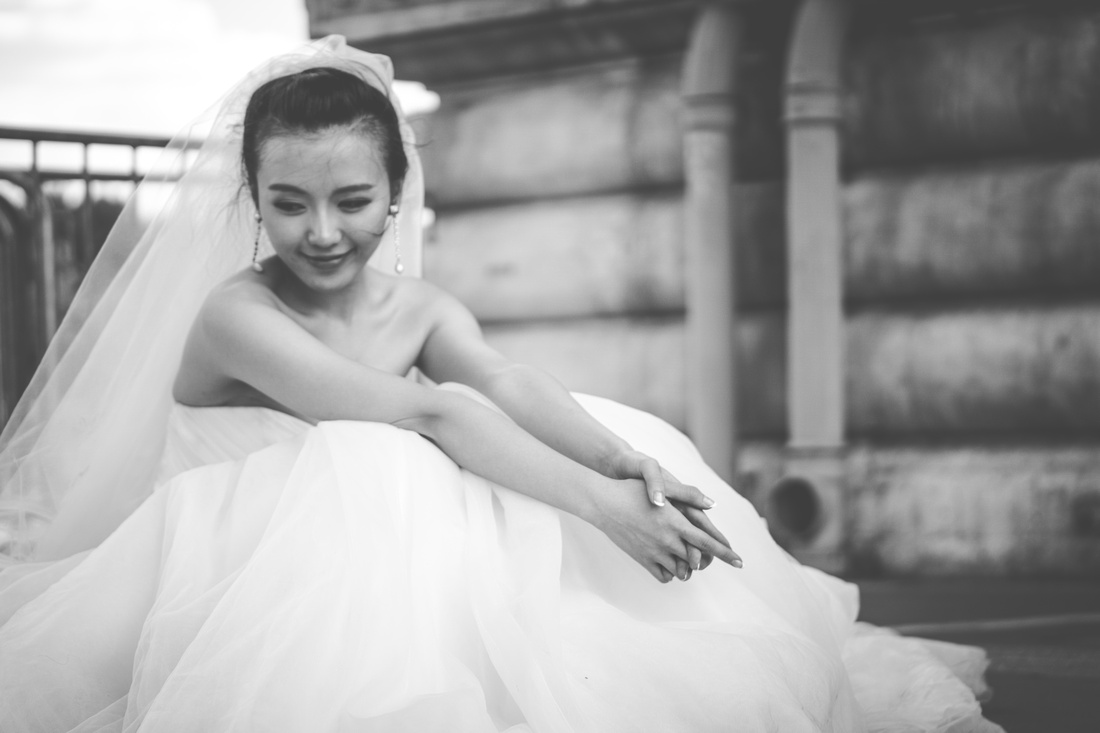
The shot below was taken on the streets in Paris it was of a Chinese bride who was having some bridal shots taken by a team of photographers. This was a street portrait in that she was aware and was happy for me to take the photograph.
I use street photography as a way to hone my photographic skills, if you can capture moments on the street when people are not always aware that you are taking photos then you will have more success in documenting those magic moments at a wedding. I may not be the best street photographer but I certainly notice the benefits of shooting street in helping me with my documentary style of wedding photography. It gives me practice in thinking fast and getting the "decisive moment".
Connecting with people
Through my street photography I feel that it is important not to force or stage the image. I feel that the candidness of the shot really shows through to the final image and can be appreciated by the viewer. I like the fact that the images I have taken are chance and may never be seen in the same way again. There is an authenticity to street photography that resonates with the viewer and they are able to share in the same moment that drew me to taking the image in the first place. I think this is what connects the view to the photographer as they are able to see through their eyes for that moment in time.

Why I shoot street
I shoot street for myself and really enjoy the fact that I am able to document and share my experiences and the things that interest me through the medium of photography. Street photography allows me to create a story in a single image and it can elevate the mundane and ordinary into interesting, poignant, emotive and powerful images. These moments are happening all around us and are available to those who are looking for them.
For those of you who have a camera or camera phone I urge you to go out and take some street photos they do not have to be award winning to tell a good story, even if the only person who enjoys them is you. In my next blog I will be giving you my tips for taking street photography and sharing with you my experience of using different cameras and lens on the street and the pros and cons with these.
Please feel free to comment on this blog and share your experiences of street photography together with any photos in the comments section below.
]]>
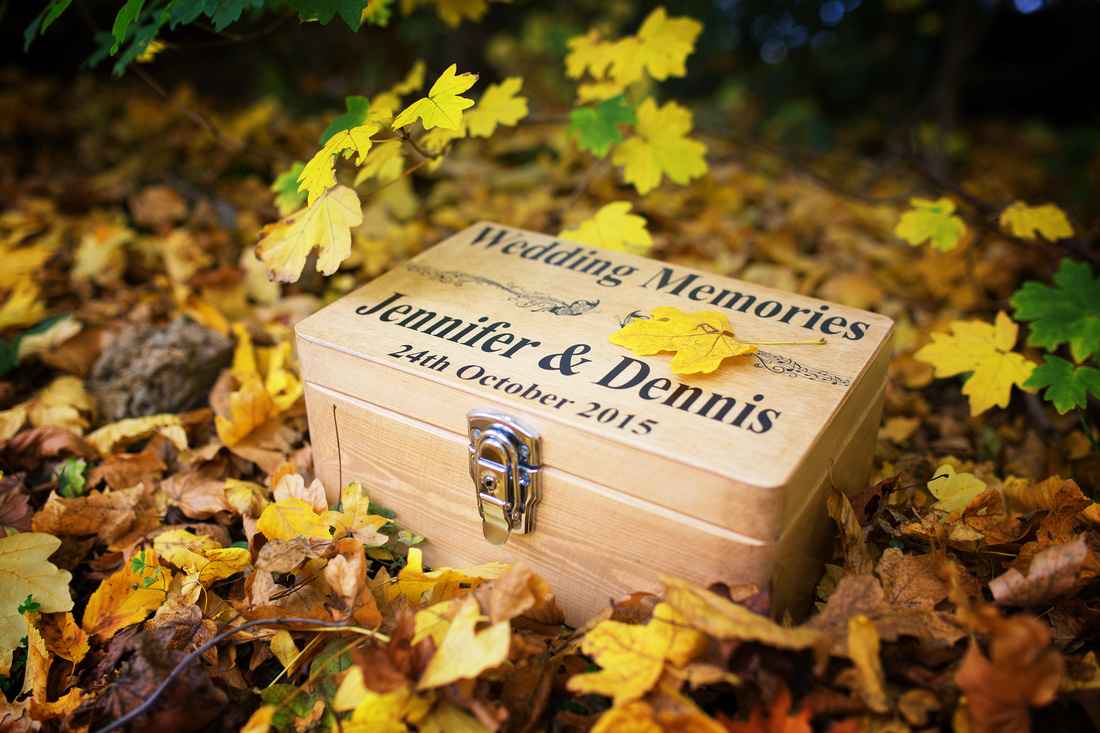
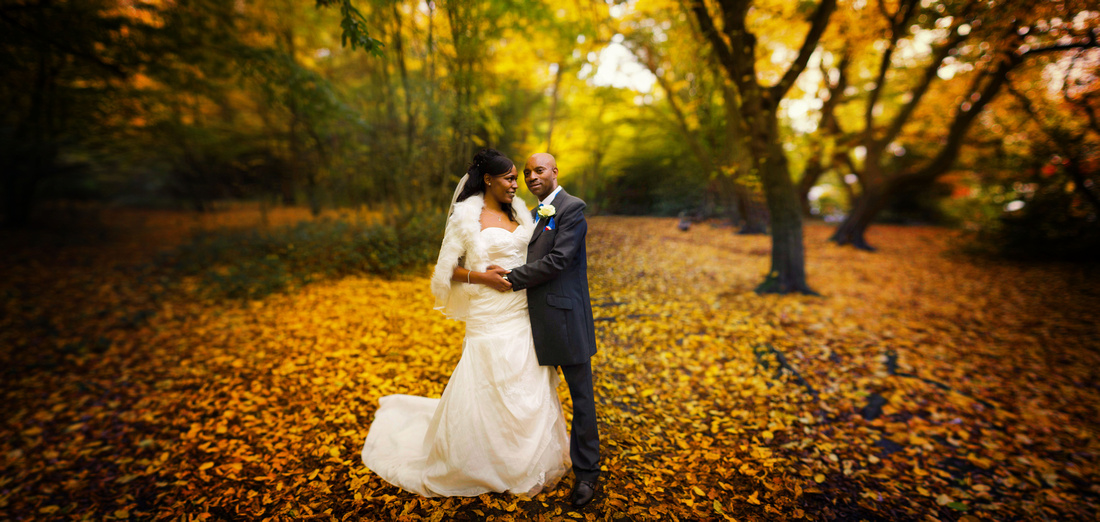
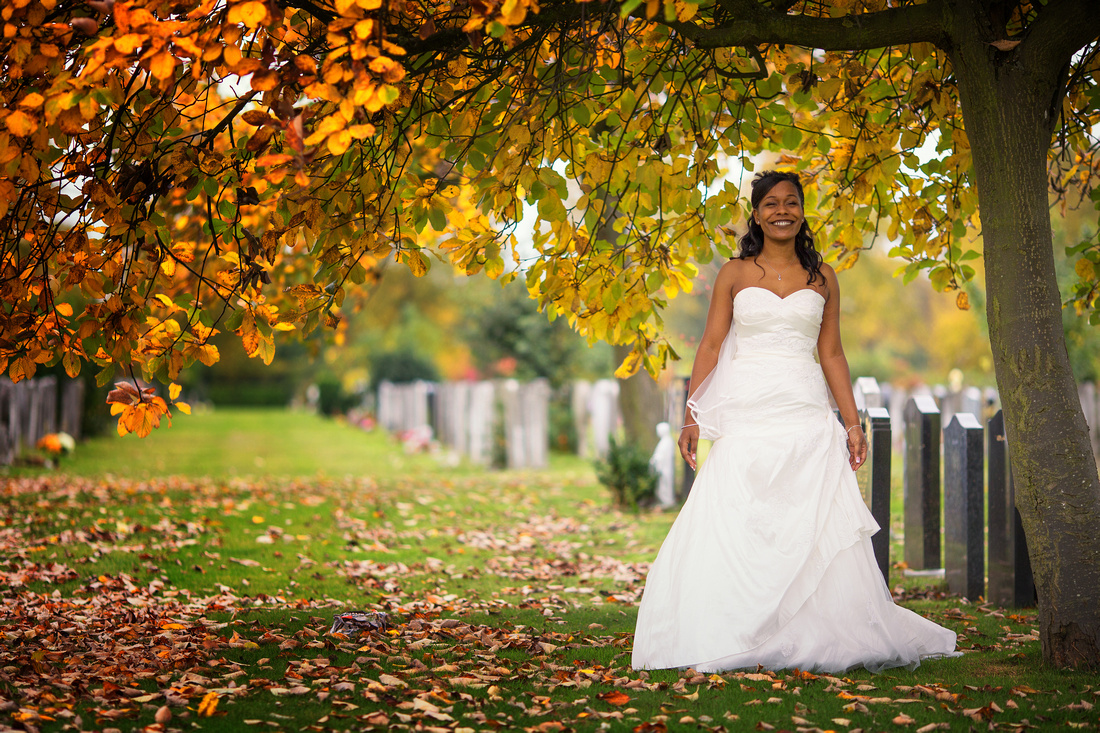
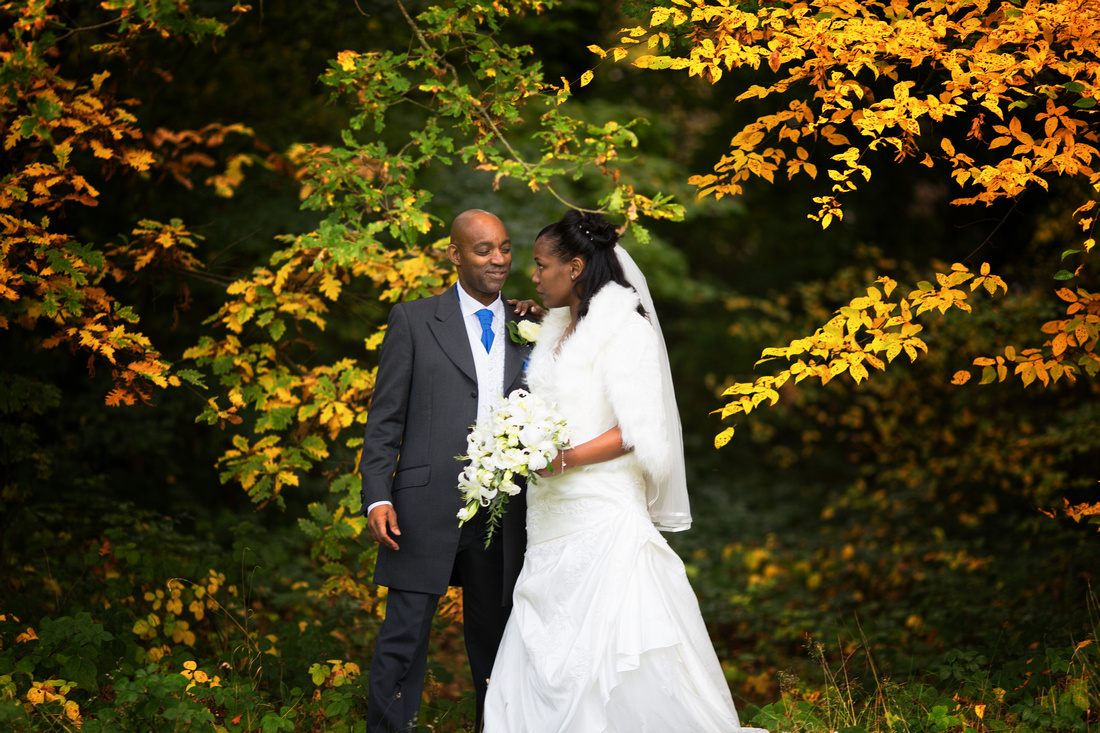
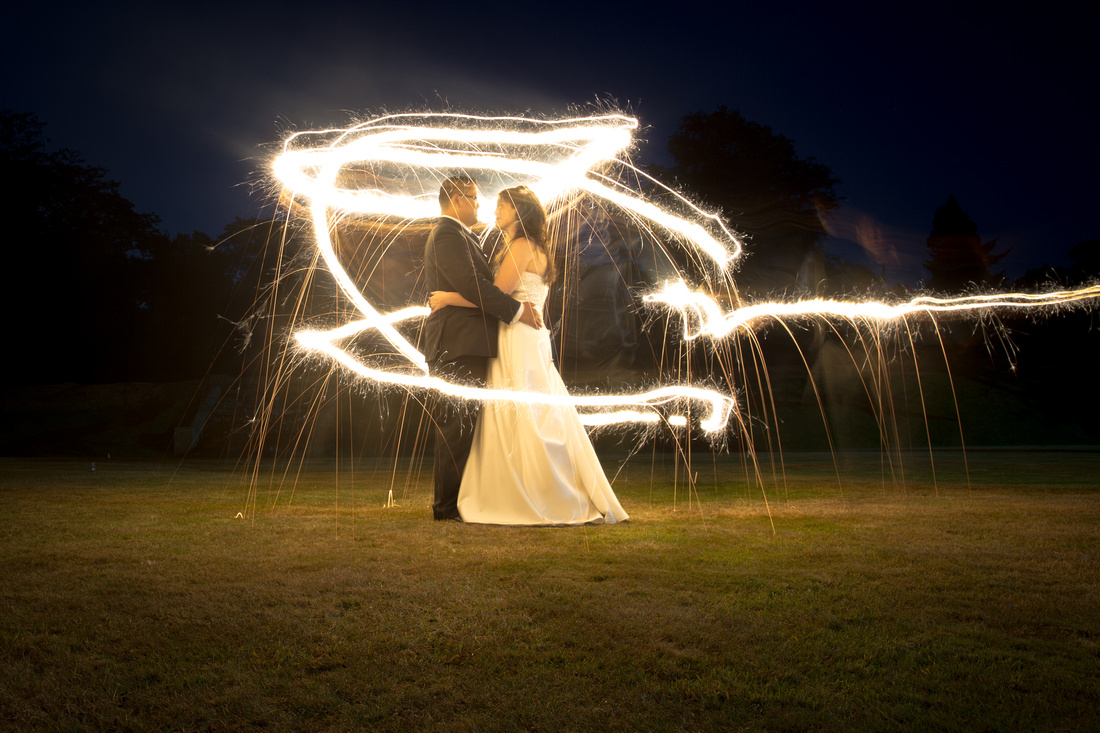
I thought I would write a blog about a wedding that I shot last autumn, with the aid of another photographer Jodi. We have worked on a number of weddings together and unlike other types of photography it really makes sense to have another photographer who you trust with you on the day to ensure that you are able to cover the range of photos needed for the album. I have done other weddings since this one, however, Jennifer and Dennis' wedding really chimed with me as there were a number of features which I feel made for an interesting wedding to shoot. The wedding took place in Epping Forest and to my mind there is no better place to have a wedding in Autumn than in a forest, the colours on the trees were amazing making the landscape photographer in me quite giddy.
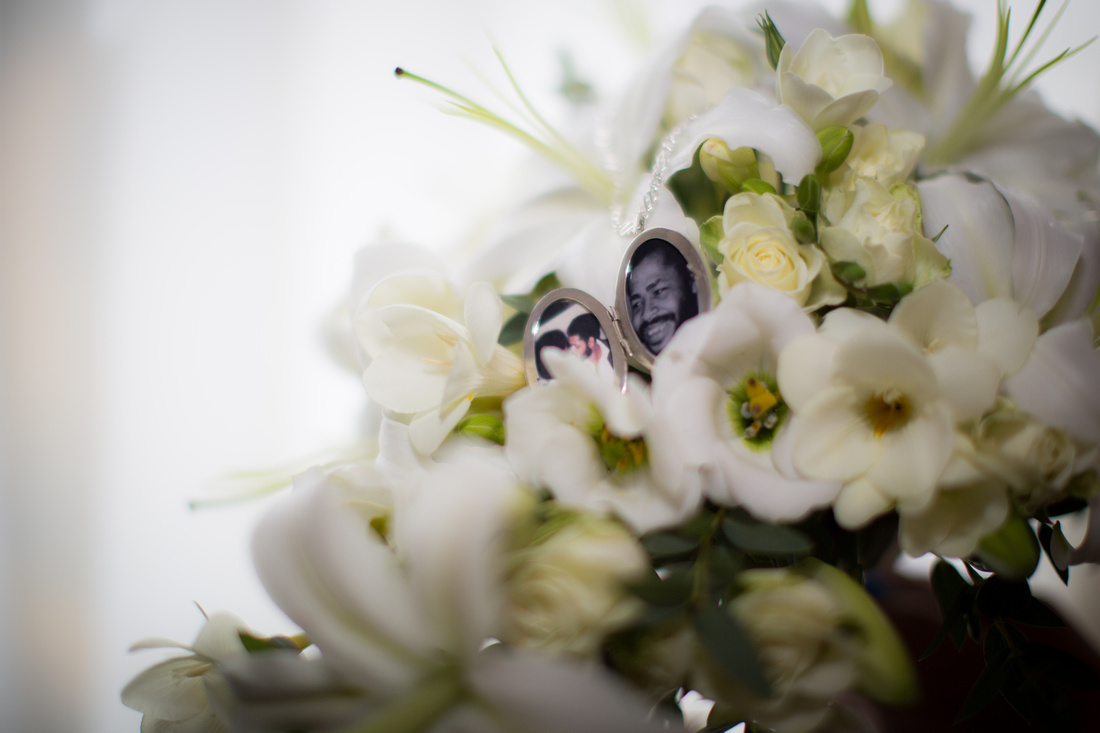
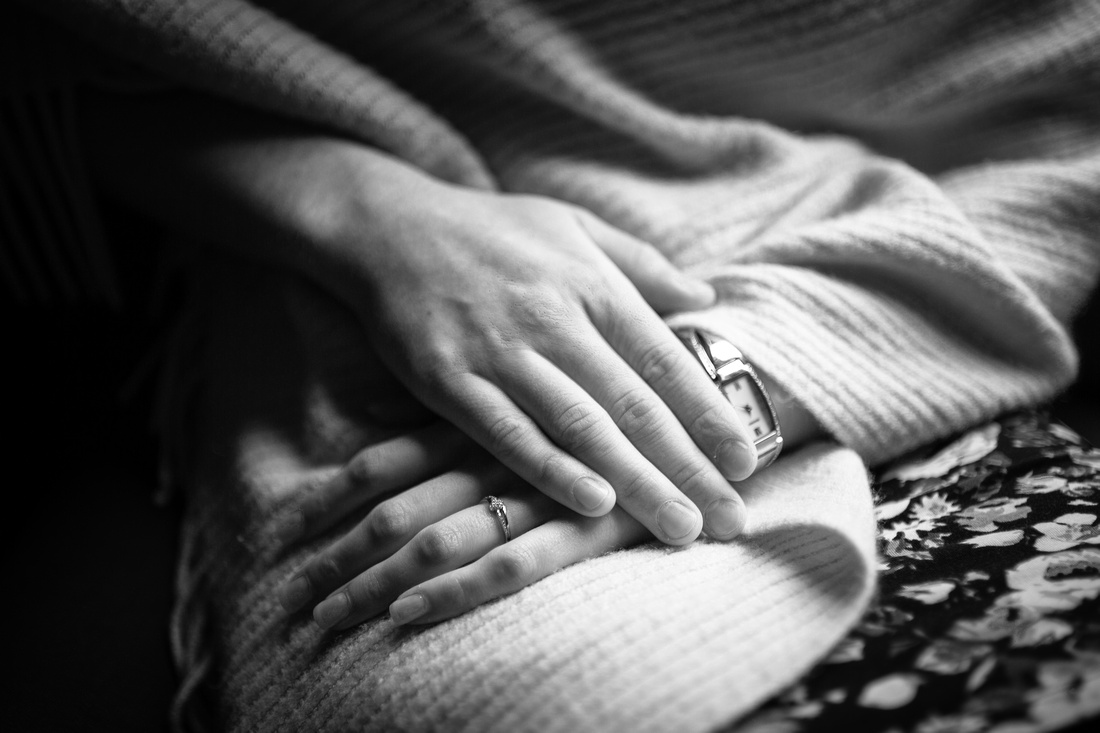
Jennifer lost her father some years ago and wanted to include him in her big day and even though he could not be there; his presence was felt strongly through her gestures and the details on the day. She was very clear with me that she wanted to have some have photos of a locket containing his picture which she kept with her throughout her day. Jennifer also visited her father's grave and wanted me to take photographs for her own record of the day as aposed to having the shots for her wedding album. Jennifer kindly allowed me to use one of the photos for this blog and notes that they were very important photos to her, which helped to reinforce her sense of her father sharing the day with her.
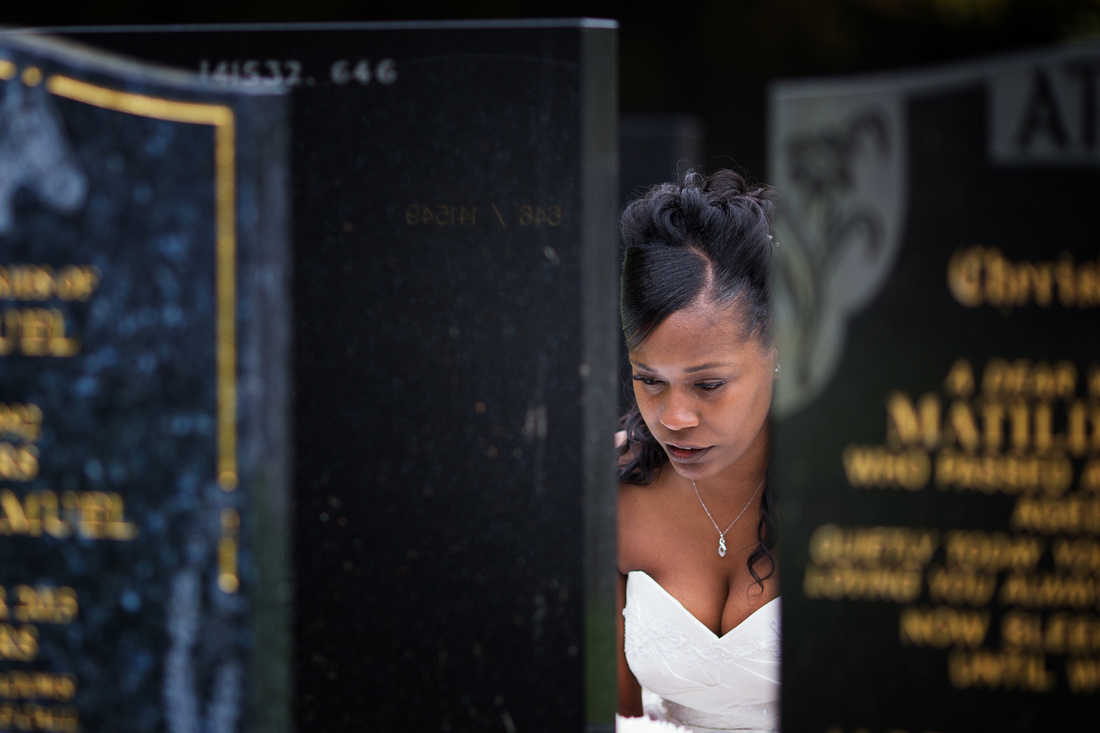
The set of images that we took at the graveyard were incredibly emotional for me as a photographer and I completely understand why Jennifer wanted them to be taken. I lost my mother 12 years ago and am getting married later this year. Her loss will be felt strongly at my wedding and the thought of all the moments that she will miss on my special day upsets me greatly. Therefore I feel I was able to empathise in some small way with the significance that these images hold for Jennifer.
Following the graveside photos we were able to capture a lighter moment in the beautiful and calm surroundings of the cemetary before going to the venue to meet with Dennis and getting the ceremony underway.
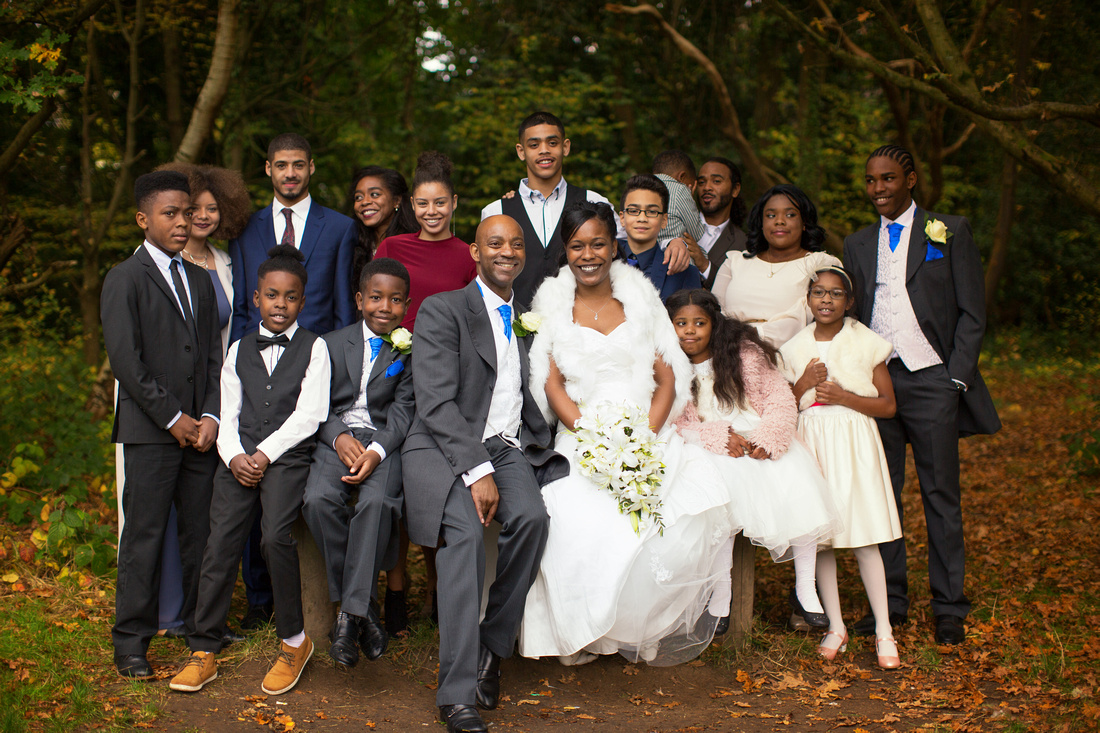
Jennifer and Dennis were married in the presence of their nearest and dearest, some of their guests were real characters and made for some great photos as they just couldn't contain their excitement for the newlyweds.

The colours of the trees made a beautiful backdrop for the couple shots and photos of the wedding guests following the wedding ceremony. This was a great time of year to get married at Epping Forest.
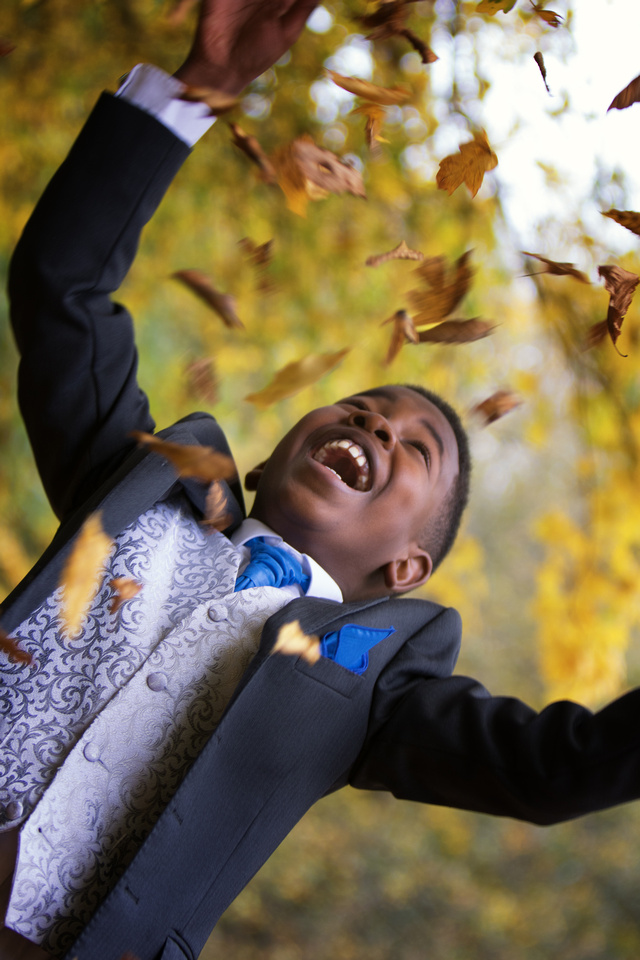
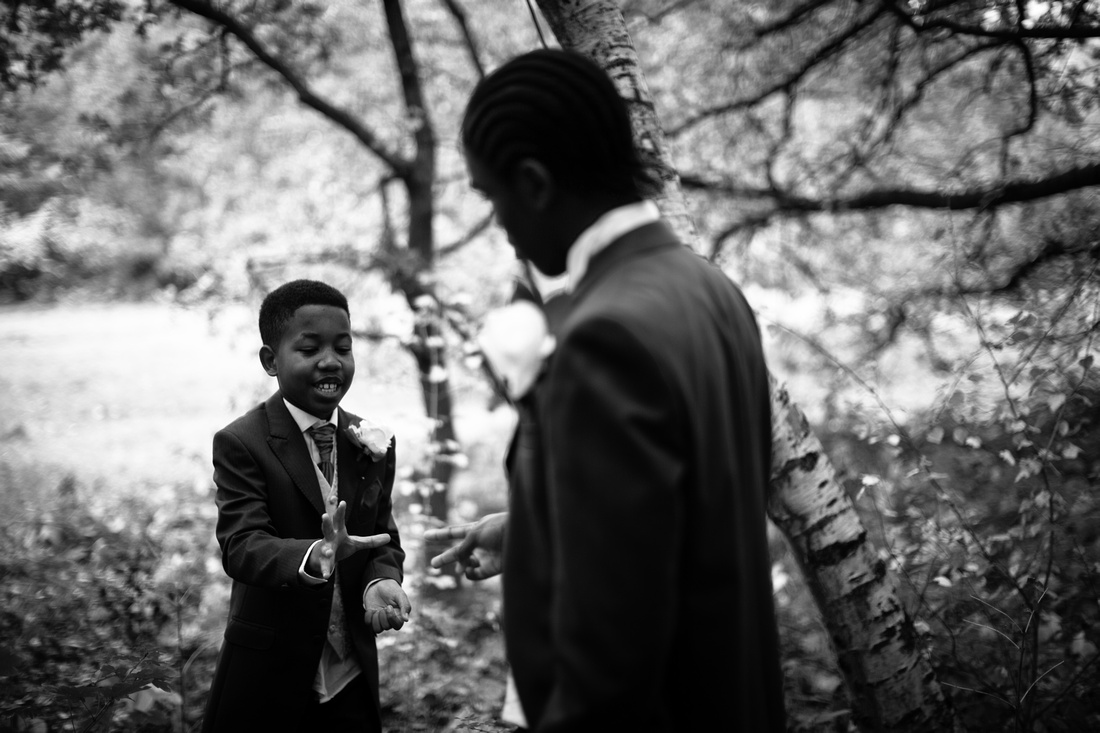
The children where able to enjoy some downtime in the forrest away from the formalities of the day.
After a long day the couple danced the night away. I had a truly wonderful time photographing their wedding and wish Jennifer and Dennis many years of happiness in their new life as husband and wife.
]]>
 What is HDR?
HDR stands for High Dynamic Range and relates to the amount of information that is contained within a photo from the light areas through to the shadows. If you've ever looked at a sunset and thought it would make a great photo but was disappointed when you looked at the back of the camera only to find that you're subject was a silhouette while the sky looked perfectly exposed or perhaps you found the reverse; where the sky is white and bears no resemblance to the amazing sunset you see before you, while you're subject is well lit. Then it may reassure you to know that you are not alone. Both of these scenarios are caused by the fact that you are asking too much of your camera as it's dynamic range is limited and is not able to discern all of the information from light to dark in the same way as our eyes. In fact our eyes are capable of seeing an equivalent of 24 stops of light as apposed to the 10-14 stops of light that most modern camera's are capable of discerning. This is due to our ability to make instant adjustments for the bright and dark areas of the scene before us as our pupils change size depending on the part of the scene we are looking at, all of this information is then translated by our brain and an image is produced which is well exposed and has better dynamic range than can be produced on the back of the camera.
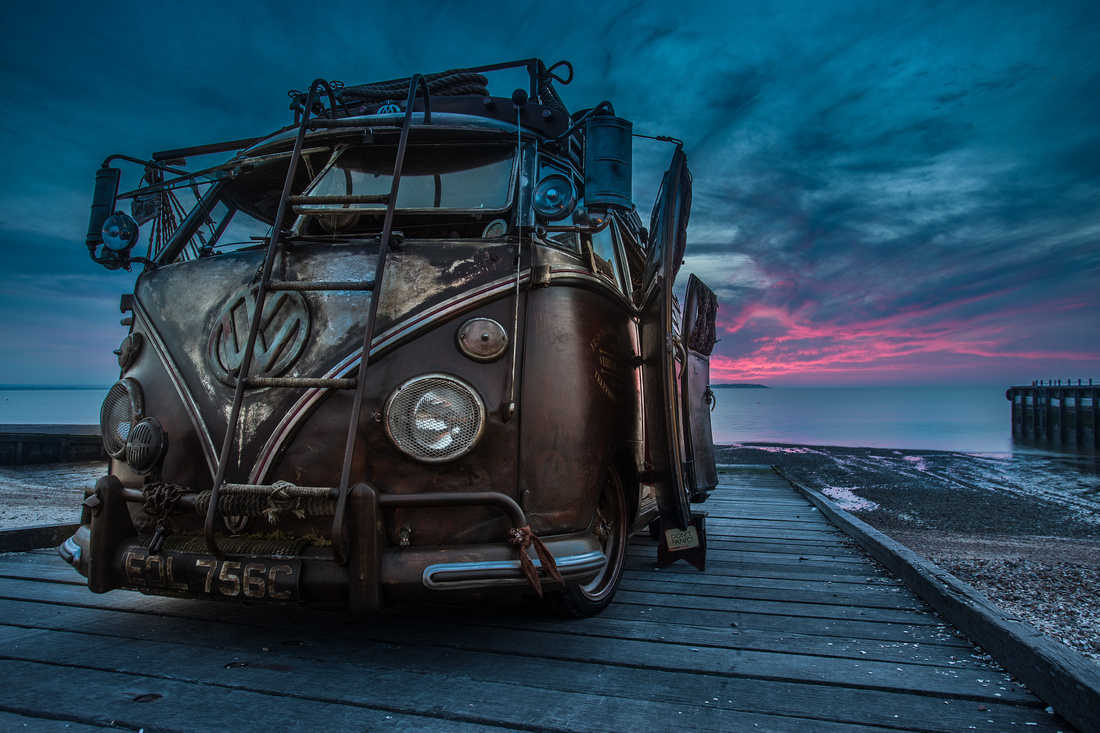
High Dynamic Range (HDR) is a term that is used to describe photos that display more dynamic range than the camera is capable of ordinarily. The below image has a High Dynamic Range but is subtle. I wanted to underexpose for the sky to capture all of the colours, however, this would have resulted in the camper van being underexposed also so I used HDR to ensure that it had a correct exposure whilst retaining the colours and detail in the sky.
How to take a HDR photo
The key to taking a HDR photo is to take more than one shot. I personally find that three photos suffice, however, I have heard of people taking up to nine, I find that this is not usually necessary for most cases and I can't think of a time when I needed to take more than three. Although I would encourage you to experiment with this method and find what works for you. For the most part I try to keep things simple as this tends to yield better results.
The reason for taking multiple images is to take a range of photos of over various exposures which, in the case of a landscapes for example, will expose for the sky and the foreground. In post production you will merge the images together resulting in a photo which benefits from having the dynamic range from each exposure.
When taking the different exposures it is easier to let the camera do the work for you. Most Modern DSLRs have a "bracketing" function this can be accessed through the menu system, on the quick menu (for canon users) or you can set up a custom setting with the bracketing options preset to that custom setting. Please see your manual or research the net on how to bracket photos on your particular camera. The option to bracket photos allows you to choose a number of photos, as stated above I would go with three, you are also able to state the gap in exposure or ev values. My preferred option is -2 stops 0stops and +2stops. Which means that my exposures will be under and over exposed by 2 stops of light while my third photo will have a normal exposure. I find these three exposed photos provide a good dynamic range for me to work with and suits my style of photography. Although you may wish to experiment with these values to suit own your needs.
When bracketing your shots I would advise that you make sure you put the 2 second timer on as this will alert the camera to the fact that you only want to press the Shutter button once and it will do the rest of the work for you. This has the added advantage of taking the photos quickly and reduces camera shake or movement of the frame as you don't need to press the button for each of the three shots. The goal here is make each photo identical as they will need to merge together in post production. I find that using a tripod really helps as this eliminates any movement, however, this is not necessary and I usually find myself handholding many of my HDR photos as I don't always want to lug a tripod around with me.
If you're camera does not have a bracketing feature, don't despair, you will simply have to perform the above process manually. Keeping in mind to change you shutter speed to alter the exposure as any change in aperture will have an impact on the depth of field for each image as well as the exposure. Using this method it is likely that you will need a tripod and I would also recommend a shutter release to reduce camera shake with each press of the shutter button.
Back on the computer
There are various ways to merge or blend photos together and I have tried and tested a few, in this blog I will discuss the method that I currently use which I find works the best for me. I use Lightroom and photoshop for my post processing. I initially take the images in to Lightroom and do any adjustments to them such as checking the remove Chromatic Aberrations button and maybe the correct lens profile button. I will then highlight the three photos that I wish to merge, right click and take them in to Photoshop using the merge to HDR pro feature. This merges the images together. The reason I use Photoshop is because it gives me an option to export the files as a 32 bit TiFF file. This is good news as it allows me to play around a lot more with the image without introducing noise or banding. I also use the "remove ghosts" option. This is valuable because not all three images are likely to be the same, for example with a landscape there may be a bird in the sky that will have moved position between the first and third shot. Therefore the remove ghosts option will allow you take one of the frames and use this as the reference frame any deviation in the other 2 photos will be matched to the reference photo and the bird will appear sharp. This is also very useful when taking photos of waves or trees on a windy day.
Following this the photo is saved and imported back in to Lightroom (Command + W on a mac and Ctrl + W on PC) where you can edit the photo as normal. I would usually take down the highlights and bring up the shadows to increase the dynamic range and then process from there.
If you do not own Lightroom and Photoshop there are software options out there my favourite being Photomatix, which is a stand alone programme and allows you to edit HDR photos with a simple user interface. A word of caution though it is very easy to get carried away with some of the presets and you can end up with photos that look very unrealistic as they take on a painterly and gritty look. Some people really like this style, and I have been guilty of experimenting with this when I was first introduced to HDR and I am no longer a Fan.I now use HDR more conservatively to boost the dynamic range to a credibly and natural level.
The key thing to remember when using HDR is that you want to emulate or enhance what you see before you and to have fun doing it, HDR can produce some extreme results and it's easy to get carried away, as you can see from the photos in this blog I have kept the shadows in the images to provide contrast, however none of the photos would have been possible as they do stretch the cameras limits in terms of the dynamic range contained within the images.
]]>
 I often get asked what lens I should buy next by those photographers who only have the one “kit” lens and are hoping to branch out a bit, but are not sure how best to invest in their choice of lens. I can only draw from my own experience. I started off by getting cheaper lenses and then progressing from their as my confidence grew. This blog is going to be an honest appraisal of some of the lenses that I have used; I shoot Canon so my focus will primarily be on lenses for this system. But my experiences can be generalised and will chime with photographers using different camera systems and lenses.
Prime Lenses
My personal preference is for prime lenses, these are lenses with a fixed focal length, and are my favourite choice for a number of reasons:
- The quality of the image from a prime lens in general is superior to that of a zoom lens. This is due to the fact that there is less glass in a prime lens, as the lens does not have to move, which results in sharper, better image quality with less chromatic aberration. That said if you are buying the top end zoom lenses then you will find that the image quality begins to match that of most primes. The Canon 70-200mm f2.8 is a great example of this as it produces some stunning images.
- Prime lenses tend to have wider apertures, meaning they are great in low light (see image below taken on a 50mm f1.2 lens) and they often produce nice bokeh, which is the aesthetic quality of the out of focus parts of an image. as seen in the image above, which was taken with an 85mm f1.8 lens at f1.8.
- Prime lenses are often lighter than their zoom lens counter parts, however if you want to cover a range of focal lengths you will have to carry multiple prime lenses rather than the one zoom lens.
- Prime lenses are often cheaper than zoom lenses of similar quality.
- Prime lenses make you work harder as you move around to create the composition you want, this results in you needing to think about framing and perspective to a greater degree than you would if you were using a zoom lens; which in turn arguably results in you becoming a better photographer.
Which focal length to buy
There are several ways to decide which focal length should be within your arsenal of lenses. I would recommend going through the meta data from your previous photos and noting which photos you prefer and the focal length of those photos.
Alternatively you could challenge yourself to shoot at a particular focal length by locking a zoom lens to the desired focal length, some zooms have a lock, otherwise you can use tape to prevent lens creep or accidentally changing the focal length yourself. This exercise will give you a feel for shooting with an equivalent prime. Just bear in mind that the prime will most likely yield better results due to better image quality and the option of having a wider aperture.
If you are seriously considering purchasing a lens but are not quite sure then you can always rent a lens. There are various company’s that provide this service and will give you an opportunity to test lenses under real world conditions at a fraction of the cost of purchasing them.
 Your style of photography will no doubt play a role in your lens choice, for example I love to shoot landscape and really like to have wide angle shots so I tend to shoot at 17mm a lot, this is due to the fact that I have a 17-40mm lens and I shoot at the widest focal length most of the time with this lens. However, when out shooting street photography I much prefer a 50mm and an 85mm lens.
I would recommend any photographer to try a 50mm prime lens, as these are made for most camera manufacturers and tend to come in a variety of flavours, ranging from cheap to expensive. I have traveled around Asia and Marrakech with a 50mm f1.8 lens costing less than £100 new. This was a light, good quality travel companion, from using this lens extensively I felt confident shooting at a 50mm focal length and I opted for the more expensive 50mm f1.2 circa £1200 which I use mainly as a street and wedding lens. The below image was taken with the cheaper 50mm f1.8.
If you have a range of focal lengths that you use and want to adopt a ‘one size fits all’ approach then a zoom lens would be the way to go. My personal favourites for wedding photography are the 24-70mm F2.8 and the 70-200mm F2.8 both of which produce excellent results and have solid and fast autofocus. Another great zoom lens is the 24-105mm F4, however, I would definitely opt for the 24-70mm F2.8 in preference as the image quality is, in my opinion much better.
As a starter zoom lens when I wanted a longer focal length for more reach, I used a Sigma 70-300mm at £100 this is a cracking lens, so long as you are able to work with it’s limitations like it's poor autofocus, lack of weather sealing and it’s shocking lens creep. I was able to get some really sharp images out of this lens. Although I am aware that there are good and bad copies of some lenses and Sigma has in the past been criticised for it’s lack of consistency, therefore I may have been lucky with my copy. But that said I would recommend the lens to anyone interested in getting started in wildlife, sports or just wanting to get closer to the action without breaking the bank.

Conclusion
With such an array of lenses to choose from it can be a daunting prospect to break away from the trusted kit lens, however, I hope that this blog will help those of you who are thinking about their first or next lens purchase. As a new and now experienced photographer I have suffered from what is fondly known in the industry as G.A.S (Gear Acquisition Syndrome) and it is only now that I am acutely aware that it is the quality of the lens which is more important than the quality of the camera. For that reason if you are hoping to improve your photography by purchasing new equipment; I would recommend buying new lenses over a new camera unless you are sure you have fully outgrown the features of you current camera body. Also bear in mind that money spent on photographic education such as books, workshops and seminars can help you to use the equipment you already own to much greater effect.
]]>
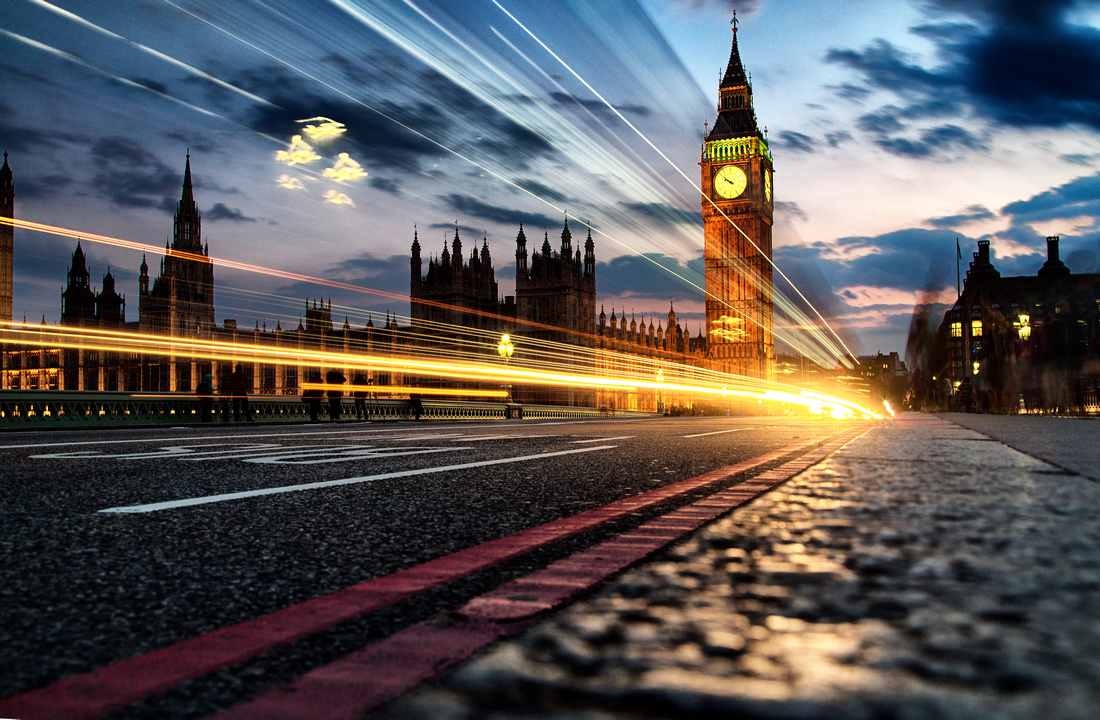 What is long exposure photography.
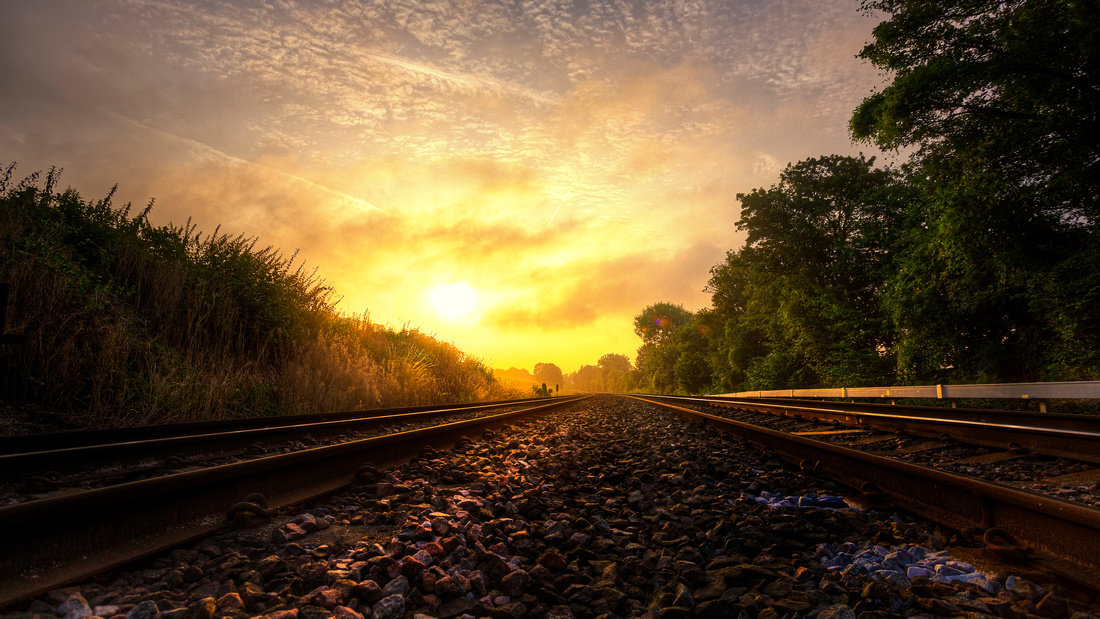
Long exposure photography refers to photos that are taken with a slower shutter speed, typically longer than 1 second to create an image that would otherwise not be possible to capture using 'normal' shutter speeds, usually fractions of a second, especially when hand-holding the camera to get the shot. In the above example the photo was taken using a shutter speed of 6 seconds and the lines of light are the light trails that were captured by a bus coming towards the camera with it's lights on during those 6 seconds. All of the stationary parts of the image such as the road and buildings remain sharp as they did not move. Long exposure photography can therefore be applied to many situations that contain a good mix of movement and stationary subjects.
Water
Using water in your long exposure photography is very effective and is a real favourite among landscape photographers. Beach scenes, waterfalls, lakes and rivers all make for perfect subjects as over time the movement of the water becomes blurred and can take on a smooth and sometimes a mirror like quality depending on the shutter speed and the conditions of the water.
 Getting rid of the crowd
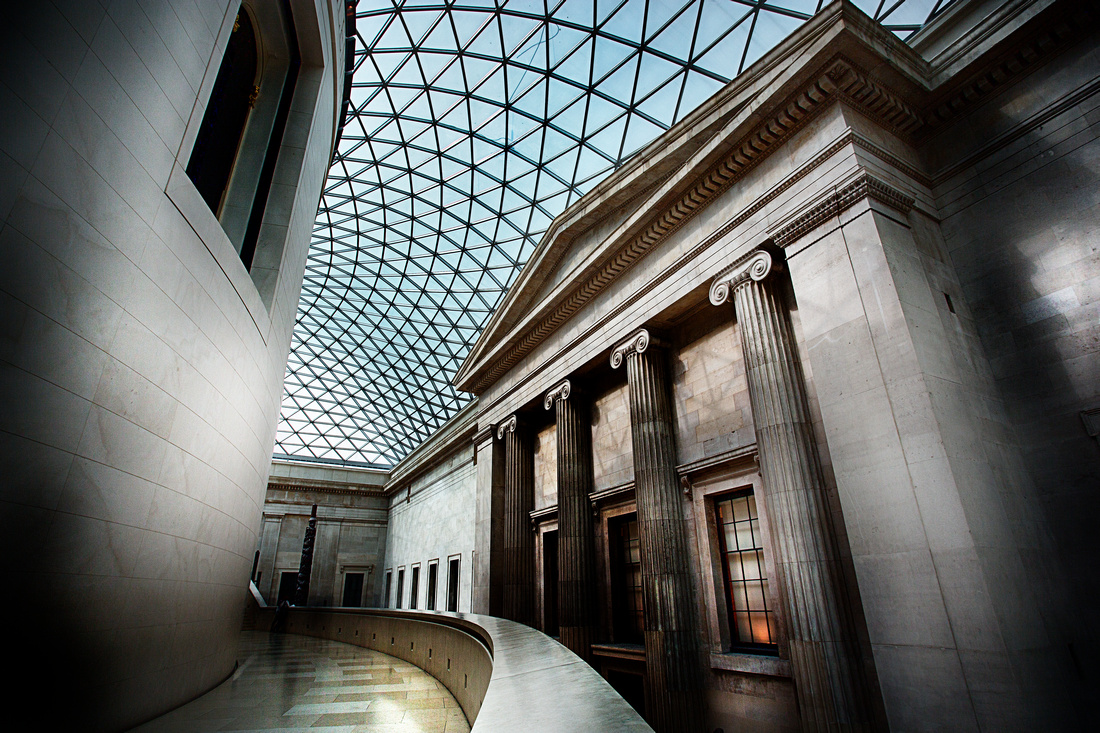
No matter how much effort you put in or how long you wait some locations are never going to be empty and coming home with a shot of your chosen spot without people photo-bombing you will be neigh on impossible. The interesting thing about long exposure is that moving subjects blur with time and provided you're in a busy area with lots of movement then it is sometime possible to 'ghost them out' using a long enough shutter speed. The example below was taken in the British Museum and I had to use a very long shutter speed, approximately 3 minutes, in order to get rid of the people that were milling around. Full tripods are not allowed in the British Museum, you could rest your camera on the ledge and prop it up with a bag, coat or anything else that come to hand. I used a Gorilla Joby which I placed on the ledge to provide me with a stable base.
When taking long exposure photos in daylight you will also need to use a Neutral Density Filter these come in various grades depending on how many stops of light you want to restrict through the lens. They are basically sunglasses for you lens and allow you to achieve much longer shutter speeds during the day without over-exposing the image. For the photograph below I used a 10 stop filter by B+W, this is a good quality filter which does not have some of the colour casting that you can get with some cheaper ND filters.
Night photography
Night photography is the perfect situation for long exposure. Without using long exposure the lighting conditions at night require you to use flash for near subjects, environmental lighting from street lights etc, a wide aperture or a high ISO. These methods are fine depending on the subject, however, the conditions really lend themselves to long exposure photography and you can achieve some very creative results. For this reason I love shooting at night and it was night photography in London that got me hooked on long exposure in the first place.

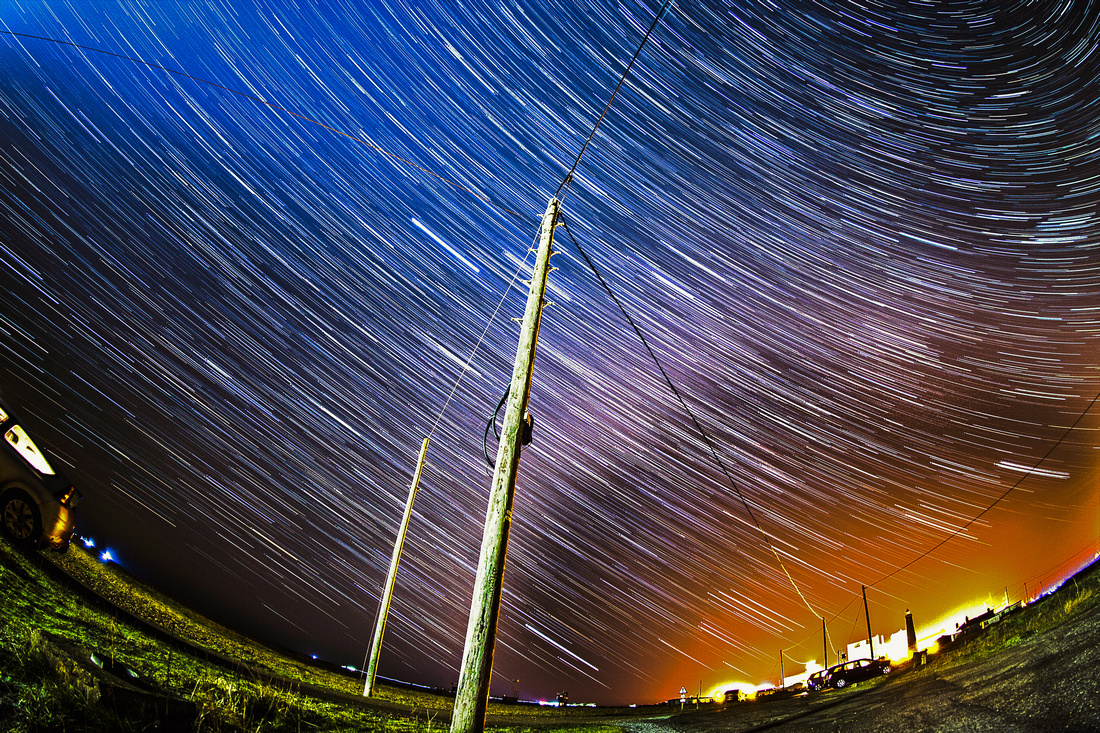
Another advantage of night photography is that in areas of lower light pollution you are able to see the stars and capture them using using longer longer exposure, however, you need to be careful if you want pin sharp images of the stars as due to the rotation of the earth the stars move and create a trail. Lenses with wider focal lengths are able to take longer exposures as a rule of thumb you should follow the 500 rule; where the maximum safe exposure time in seconds is equal to 500 divided by the focal length. For example if you use a 35mm lens you will be able to achieve a 14 second exposure before introducing any star trail to the image.
However, if the exposure is of an extreme length upwards of 30 minutes then the star trails can be purposefully employed as a creative choice. Personally I like to take these photos and will talk about how to create star trails in a future blog as this is a blog in itself.
Movement
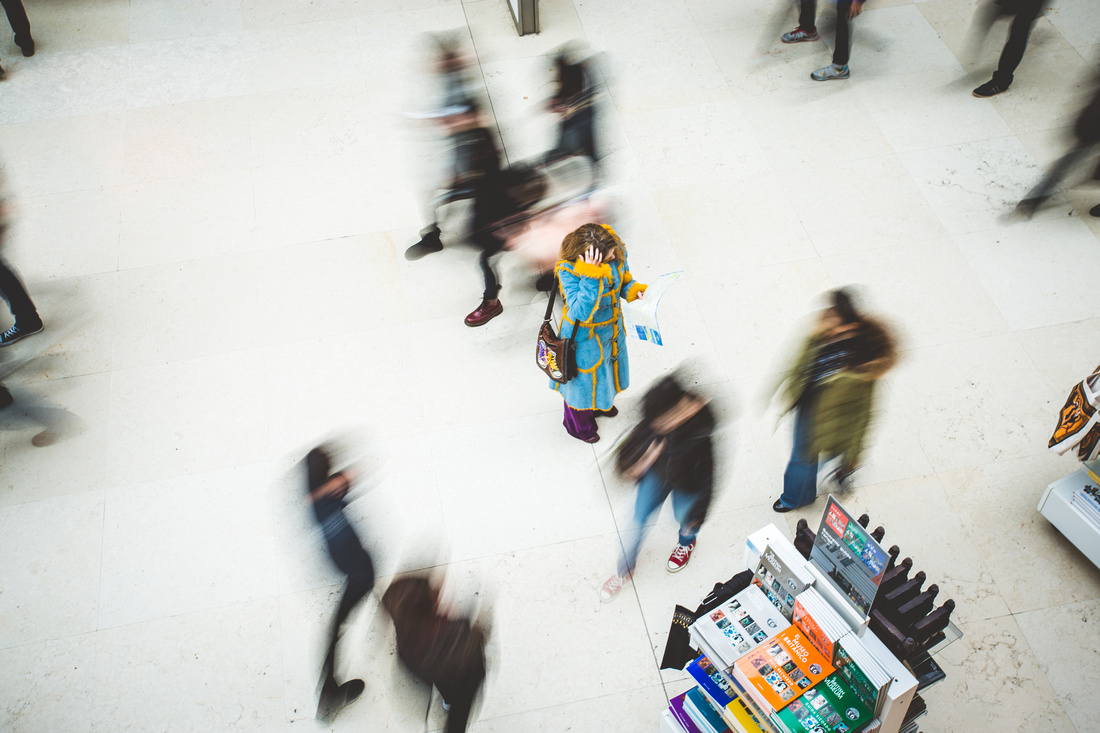
Part of using creative choices such as long exposure is to help to convey a story, showing drama and movement. Whilst I was in the British Museum I noticed a woman who was looking at a map and appeared to be lost. She was standing still whilst looking at the Museum layout so I decided to use a longer exposure to single her out and create a sense of movement whilst isolating her, this helps to identify her as the subject of the photo, otherwise she could have just been another person in the crowd.
Distorting reality
The great thing with long exposure is it allows viewers to see the world differently through the vision of the photographer. Long exposure can create otherworldly and etherial images that can evoke different emotions and moods depending on the length of the exposure, the perspective, composition and the subjects contained within the images. Ultimately it is up to you as the photographer to use long exposure as a creative tool to help the image convey the story. There are no rights or wrongs and once you start experimenting with slower shutter speeds it can be a lot of fun.
]]>
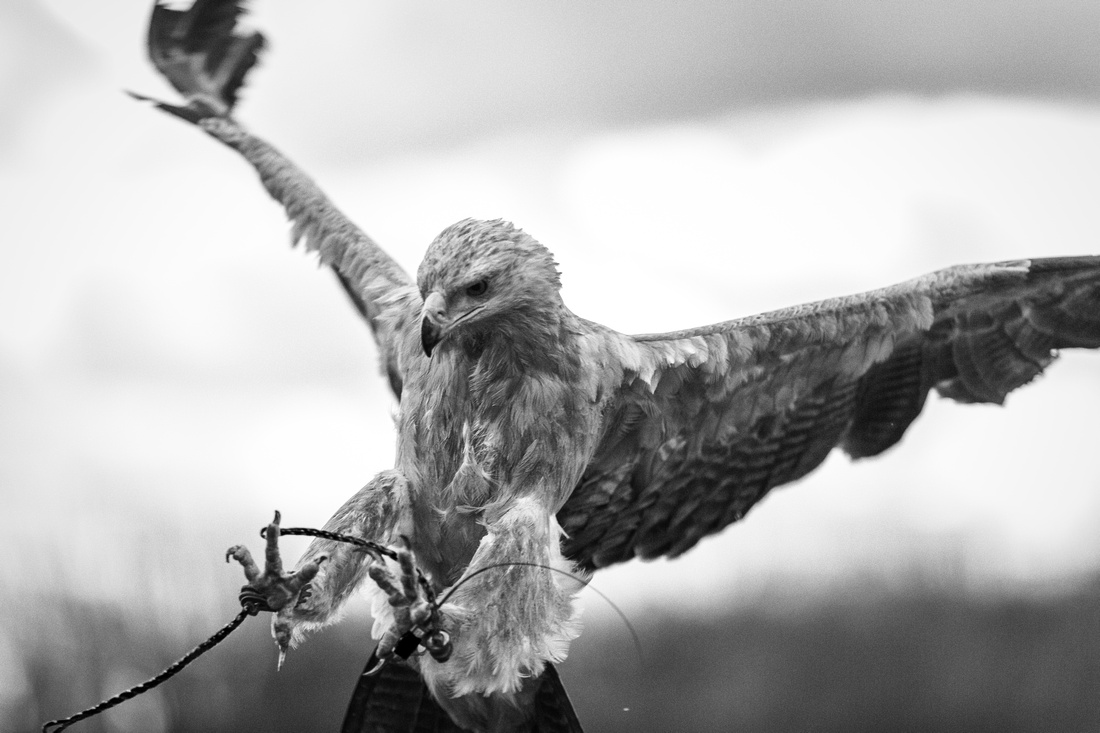
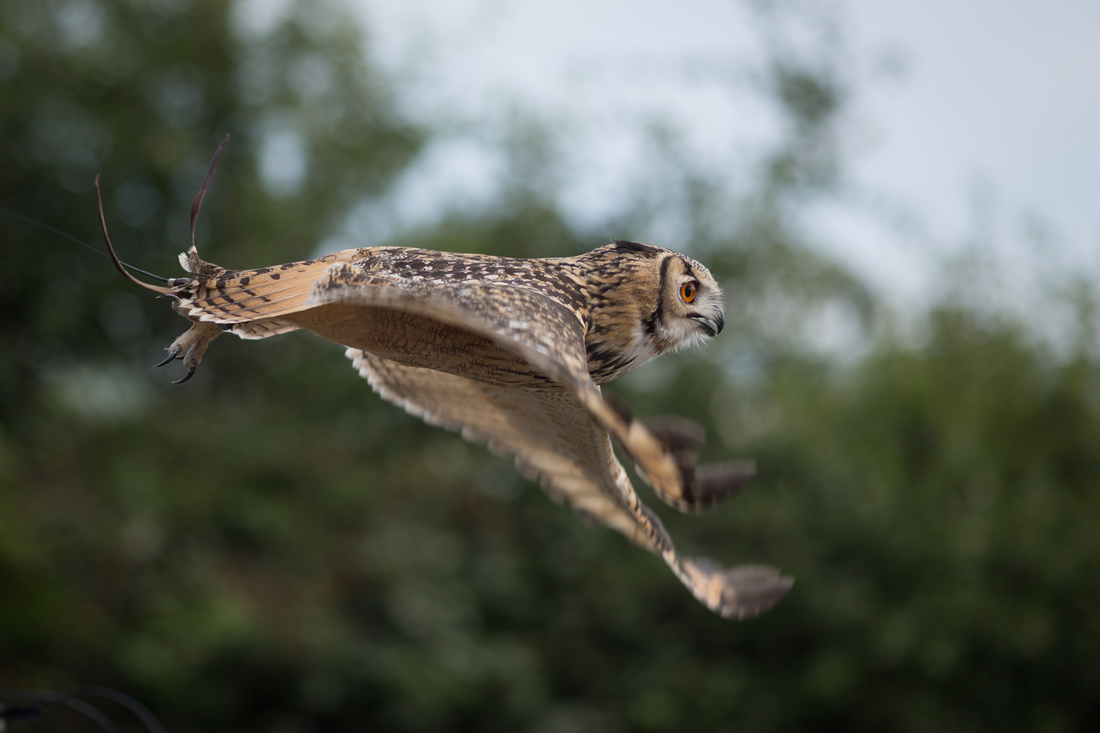
One of the major challenges I faced as a fledgling photographer was taking a sharp image of a bird in flight and If I managed this almost impossible task I would usually have a bin or someone's head in the background making it unclear as to the subject of the photo or worse still the bird would be so small that I would have to crop the image to within an inch of it's life in my attempt to save the photo. My other frustration came from not being able to nail the focus on the bird in time as the pesky little winged tormentor would fly past me at speed without registering on my camera's sensor. If this sounds familiar and you would like some pointers on how to push the balance in your favour then I have some tips for capturing sharp images of birds in flight.
Use the right settings
This may seem like common sense but have you checked that your shutter speeds match the speed of the bird and the focal length you are using to ensure that you are getting a sharp image. In general I would say you are safe with shutter speeds of 1/1000 for most birds and depending on the focal length this will cover you in terms of eliminating camera shake. The rule of thumb being that your shutter speed should be 1/focal length. I tend to shoot with a 200mm prime lens therefore my shutter speed with the lens on the camera should always be at least 1/200 regardless of my subject to avoid camera shake. It will of course need to be significantly faster than this to catch a bird in flight.
Your camera should have a continuous focussing mode on Canon, which I shoot with, this is called AI Servo and is called AF-C (Continuous focusing) on Nikon. This focusing mode ensures that the camera will keep hunting for focus which is especially useful for moving subjects such as birds in flight. In order to take advantage of this mode you will need to keep the focusing button held down to maintain focus.
I would also recommend that you use single point focus and aim this single point at the bird in order to achieve a sharp focus, this works better than multi point focus which can end up focusing on clouds, bins, benches, cars or anything other than the bird.
Not all lenes or cameras are created equal
Photographers spend a lot of money on the latest cameras and lenses sometimes this is not necessary however, when it comes to fast auto focus every little helps. I would recommend using a long lens 200mm upwards to increase your chance of getting close up shots of birds in flight. It goes without saying that if your camera has a superior auto focus system and a great lens that focuses with ease you're going to have a much better chance of getting the shot. This does not mean that without this combination you can't achieve just as good photos although you need to be aware of the limitations of your equipment.
In order to make it easier for yourself it is good to know that every camera's auto focus system works faster when the subject is moving across the photographer's line of sight rather than towards them. Therefore it helps to know that if you position yourself perpendicular to the bird you are going to have a better chance of capturing a sharp image. Once you have nailed this try experimenting with different angles to learn what the limits of your particular camera and lens are.
Not all birds are created equal
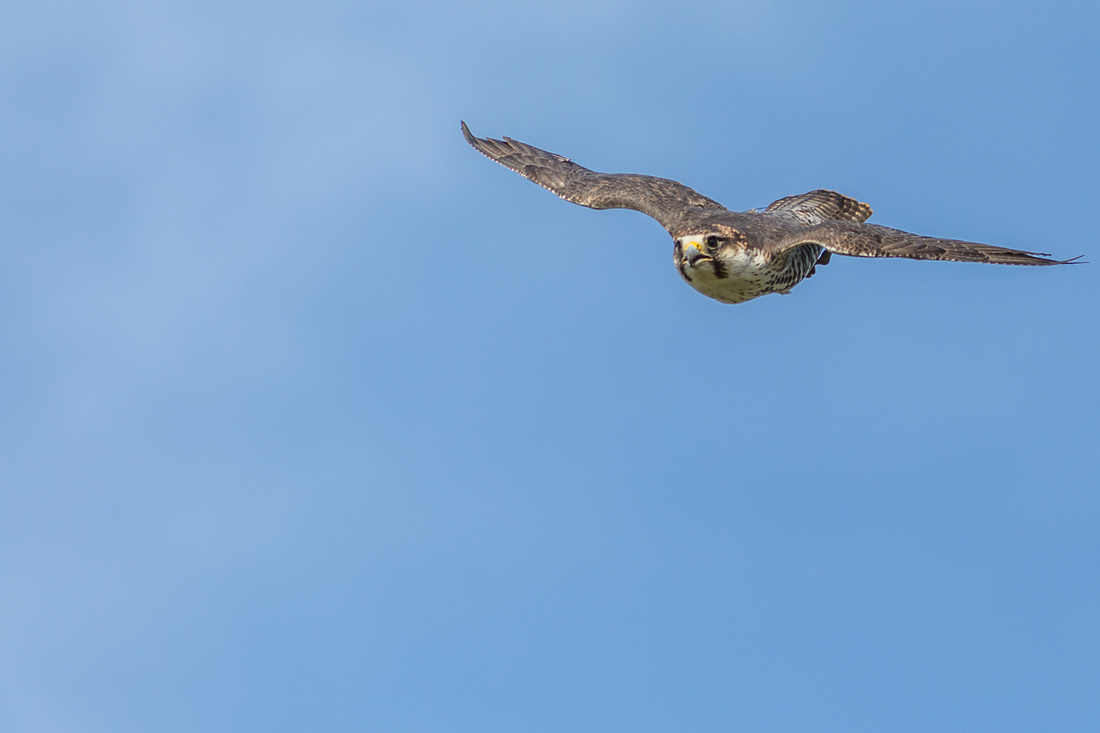
It goes without saying that the faster the bird the greater the challenge in getting the shot you want. I would recommend trying to capture photos of seagulls when next at the beach, they are larger birds that tend to hover making it easier to focus on them. The more difficult birds tend to be their smaller faster counter parts however, even the fastest birds in the world can be captured using strategy. For example, below is a photo of a falcon this particular falcon will shortly attempt a world record for the fastest bird in flight and it is estimated that he will reach speeds of over 200mph. In order to capture a sharp image I watched the falcon's flight path and noted periods when the falcon slowed to give me a chance to capture the image. I noted that when the falcon changed direction he would soar into the sky and turn to come back down at this point he would come to a brief stop in mid-air before speeding up again providing the perfect opportunity to capture him in flight.
More focus
Having more of the photo in focus would also tip the balance in your favour this could be achieved by decreasing your aperture (raising your f stop number) to f8 or higher this will ensure that more of the photo is in focus, eliminating the need to fine tune the focus area creating more chance that the bird will be in focus. The downside of this method is that you will have a slower shutter speed at the same ISO so you may need to raise the ISO to achieve a desirable shutter speed. If possible wider apertures are great way to achieve faster shutter speeds.
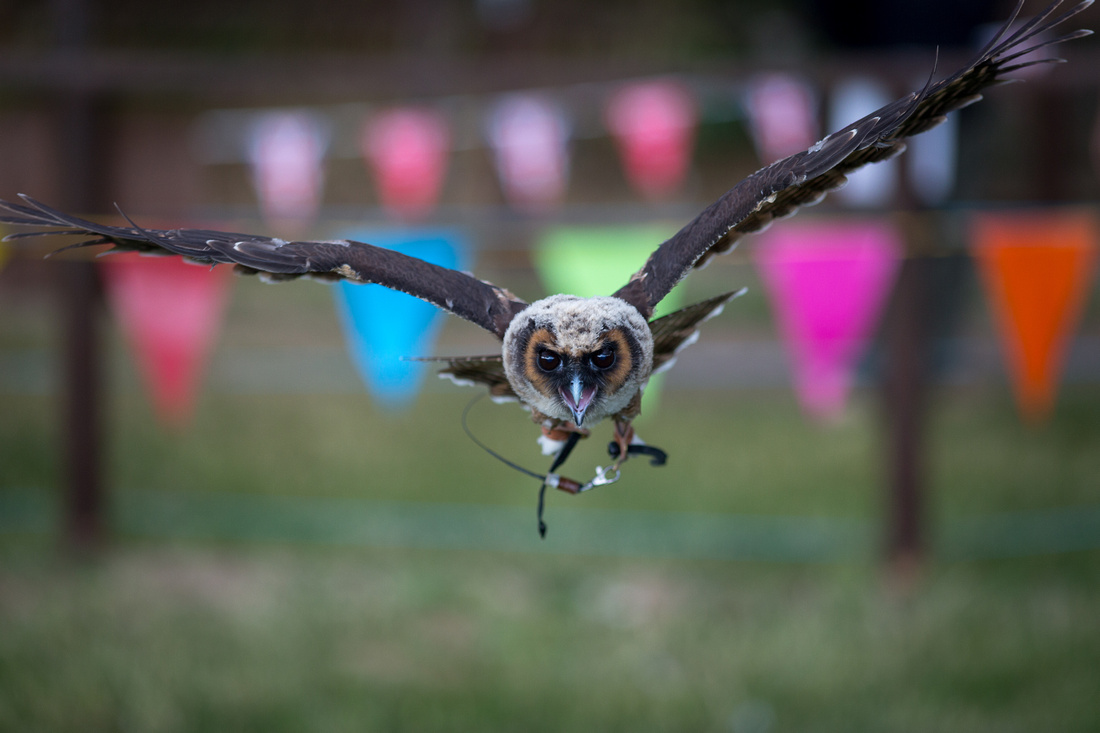
If all else fails, you can always wait for the opportunity to take a shot when the bird is not in flight and remember practice makes perfect.

]]>
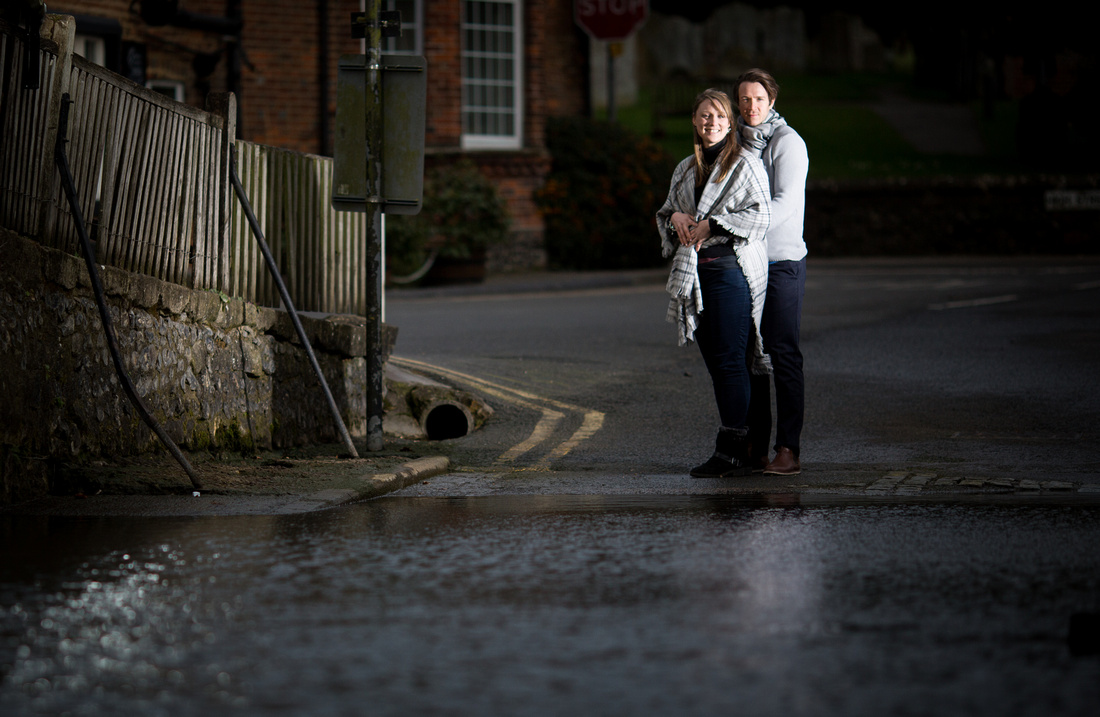
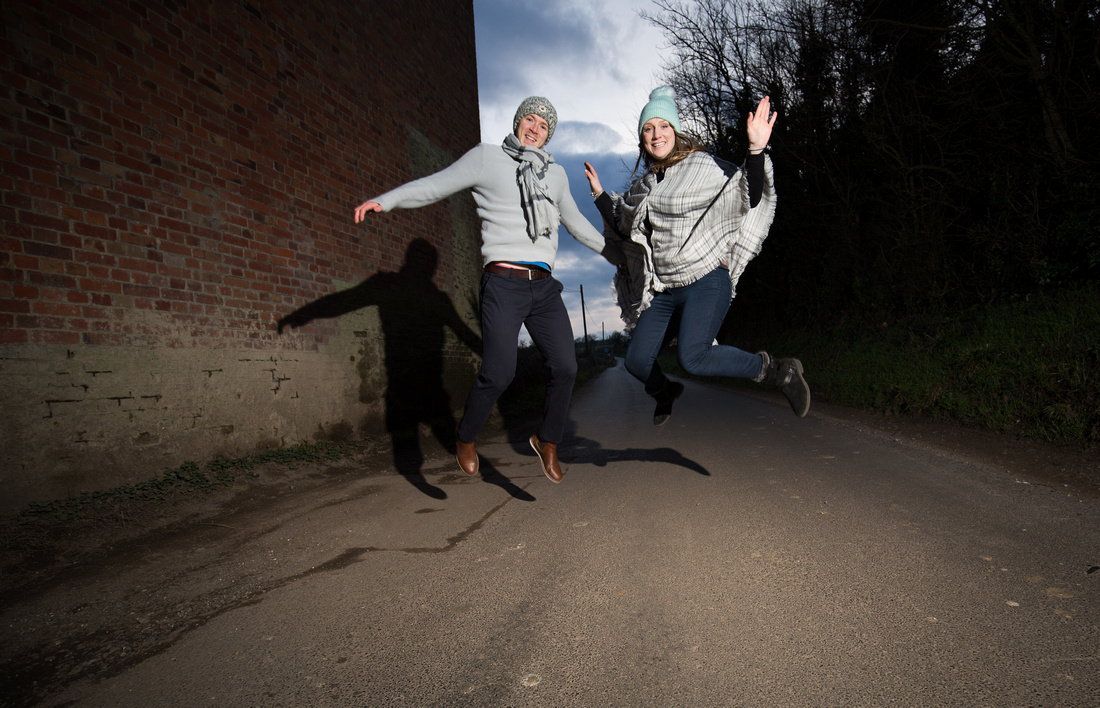
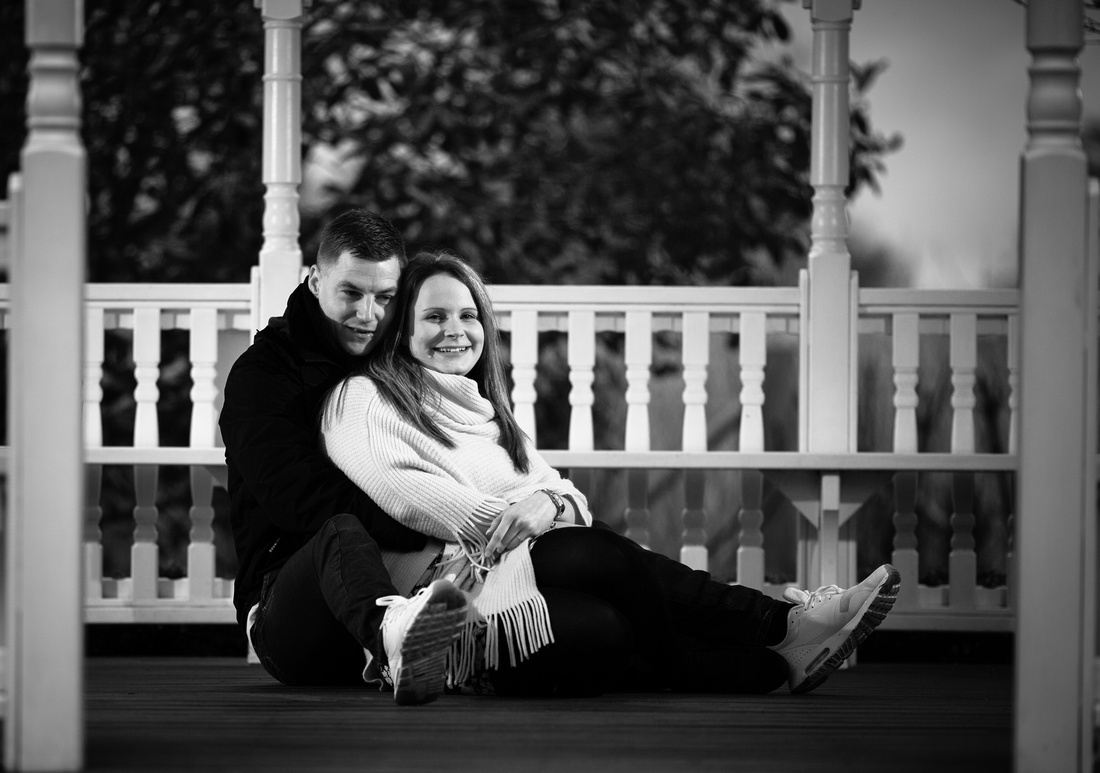
Engagement shoot
An engagement shoot for those of you who don’t know is a pre-wedding shoot with the couple a few months prior to the wedding. I would also recommend having an engagement shoot for a number of reasons, which will be covered in this blog.
Getting to know each other
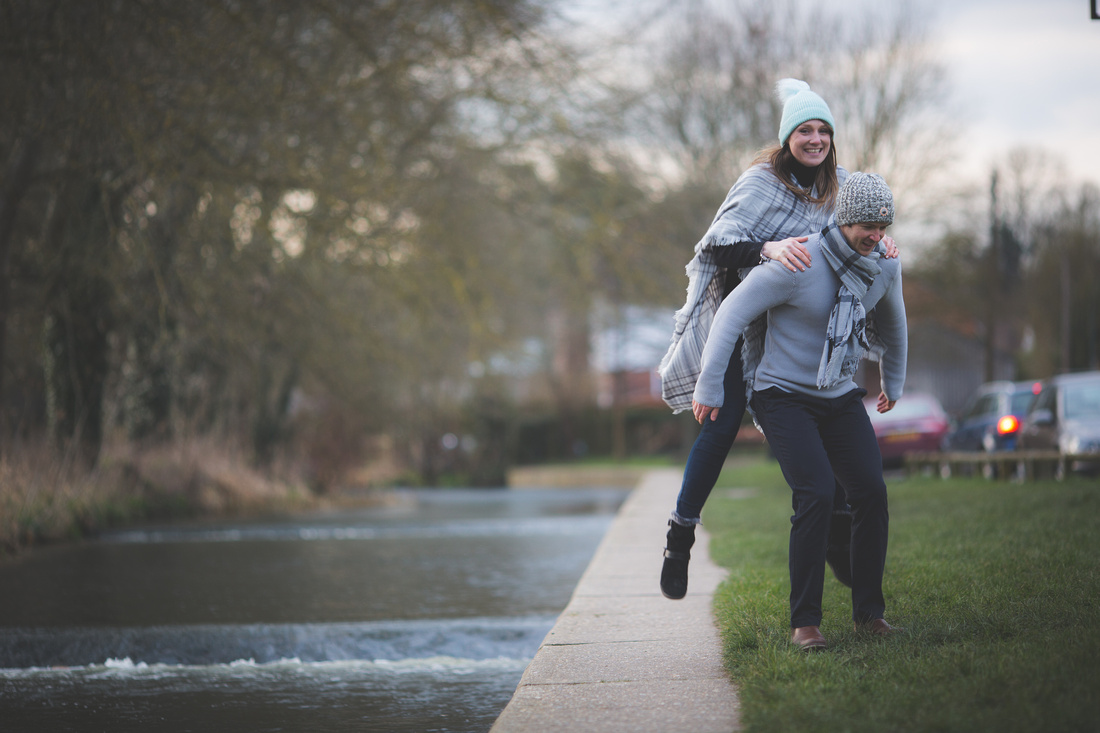
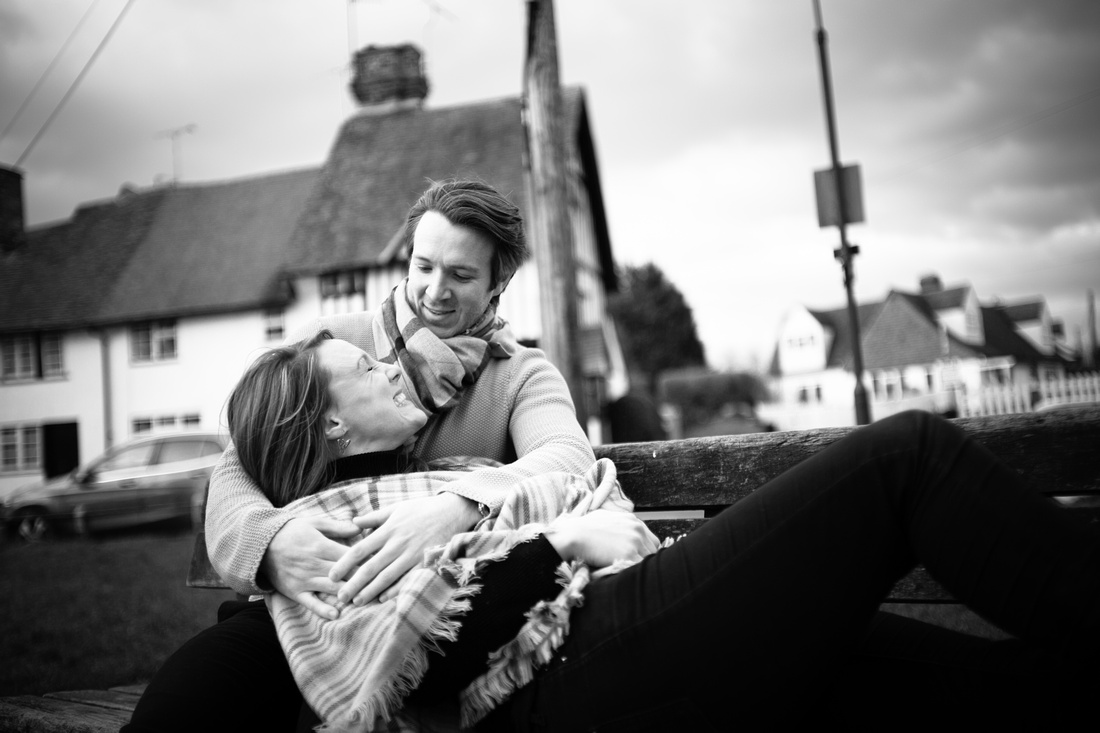
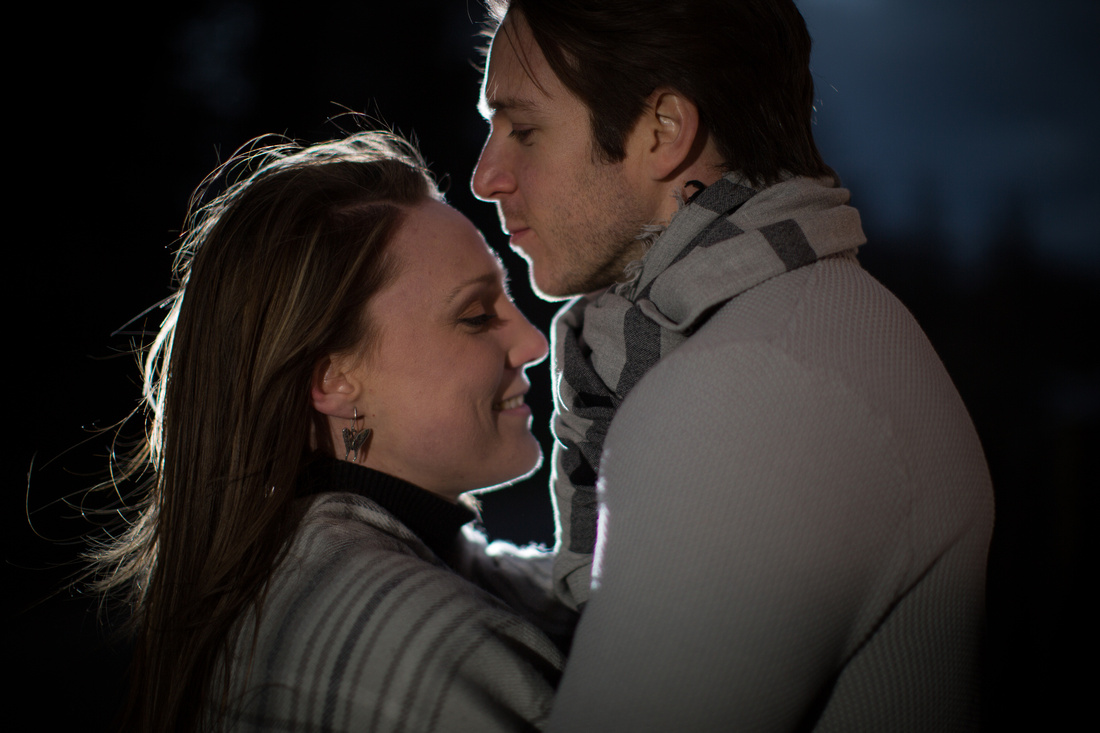
The engagement shoot is not just about having some great photos before the wedding. It is a real chance for the couple to experience being photographed together in a romantic way. For most this is a very private and vulnerable experience, however, most couples find that they enjoy the shoot after their initial reservations. This is also an opportunity for the photographer to learn some key aspects about the couple for example, gestures, how they interact when they are relaxed and what they like and don’t like in terms of posing and being behind the camera.
In this respect the engagement shoot acts as a dummy run for the wedding, any photos that don’t work because the poses are not suited to the couple or they feel uncomfortable can be discarded in favour of the ones which work well, giving both the photographer and the couple the best chance of getting the right photos on the day when it counts.
I have done weddings with and without engagement shoots and I can tell you from experience that the bride and grooms, who had recently had an engagement shoot were a lot more natural and less self conscious in front of the camera as they were familiar with the process and had built a rapport with me, resulting in much better photos
Creating interest
Many couples cherish their engagement photos and will share them with friends and family through social media on Facebook and twitter or through a link to the photographer’s website. This helps to create excitement and a buzz around their upcoming wedding. I have shot weddings where the engagement photos were incorporated in to the day somehow, either on with a slideshow on a screen or by having prints dotted around to compliment the decoration and theme of the wedding. This really helps to create a story around the Bride and Groom’s journey together and gets the guests excited about the official photographs from the day.
Bottom Line
Whether they come as part of the wedding package or as a separate add on, engagement photos will certainly help to enhance and compliment the wedding photos as the photographer becomes more familiar with the couple and they become more confident behind the camera. Engagement photos are not essential but it is surprising how much difference the experience can make on the day.
]]>
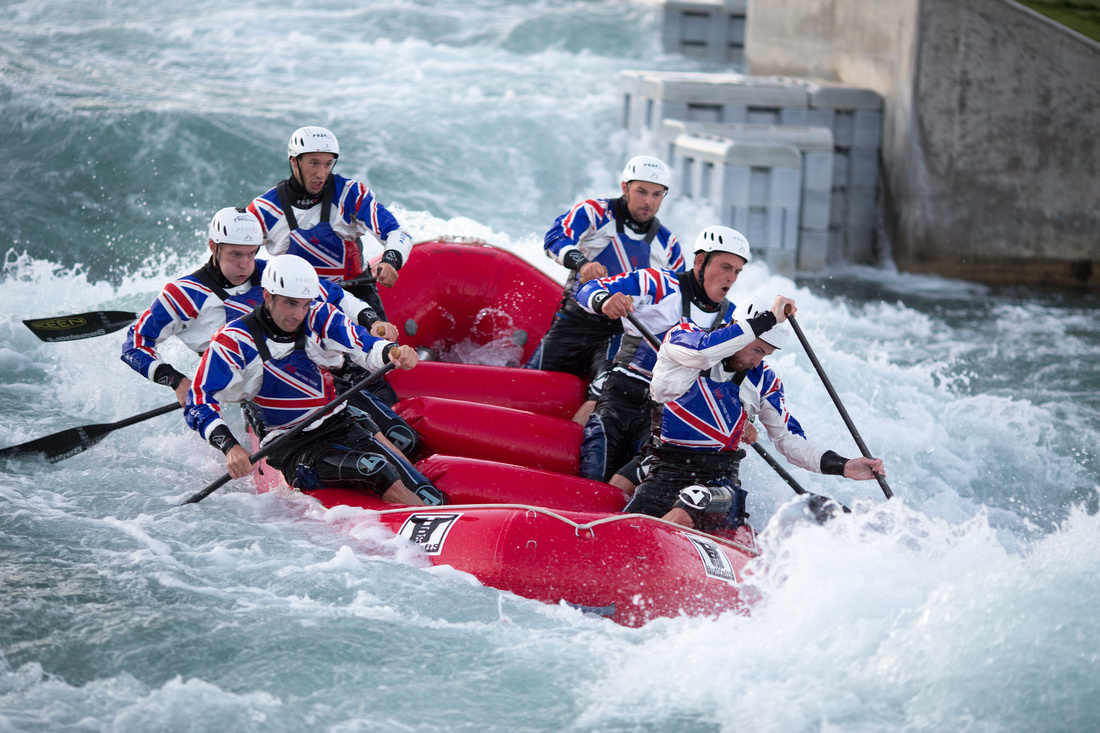
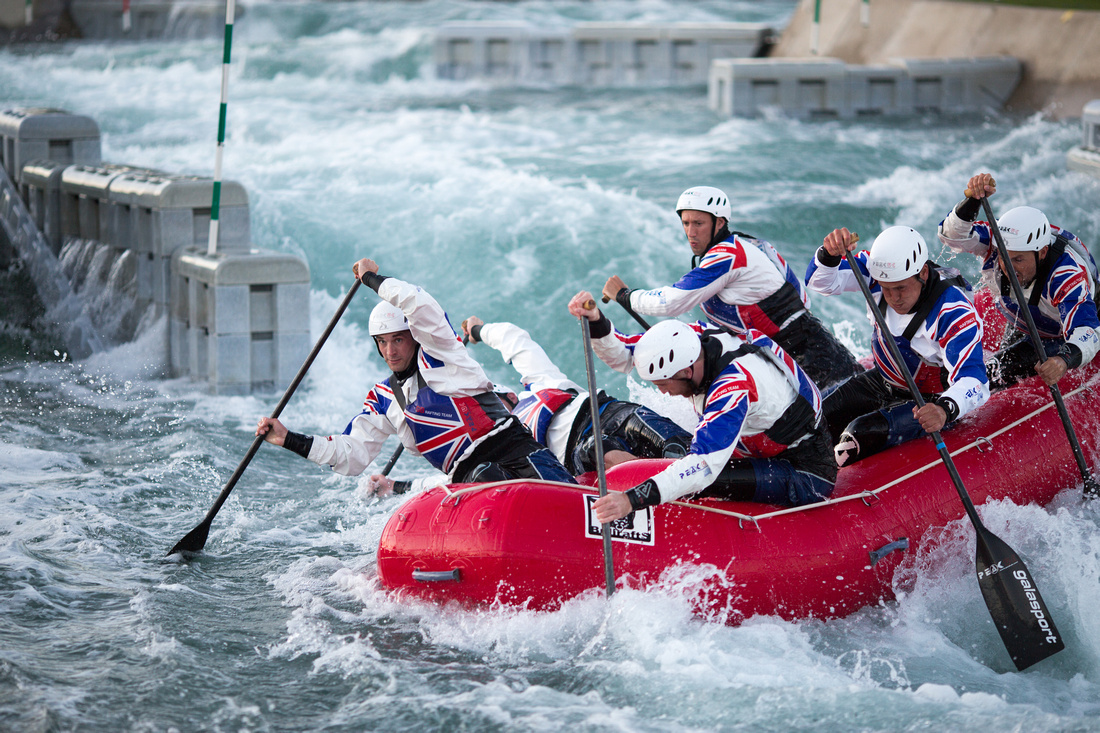
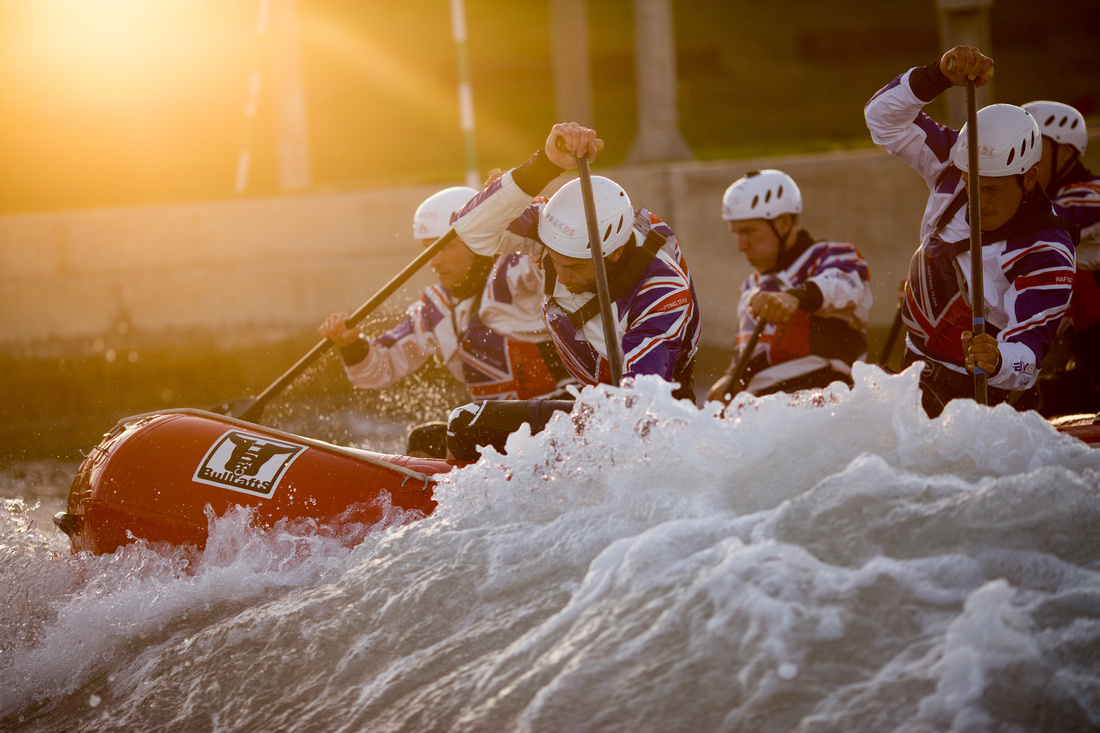 Being a photographer is not without it's perks, sometimes you are able to get closer to the action and are treated to a glimpse into the real lives of extraordinary people. Back is September I was fortunate enough to be asked to document a training session for the Great British mens white water rafting team during which I got to see the incredible feats that they achieved whilst training on the olympic course at Lee Valley Park.
 The Course was gruelling and during the hour long session the team certainly put themselves through their paces and there was no sign of them holding back in their bid to prepare for the world championships in Indonesia later this year. I have to say I was really struck at how hard these men worked and pulled together in order to get the raft around the course and their joint skill and expertise really shone through. The members of the team live some distance from each other making training difficult. Added to this they are self funded so they have the pressure of raising funds for equipment, travel and other expenses yet the love of the sport drives them on. This is why I feel privileged to support them in a small way through my photography to help them raise awareness and generate interest in the sport.
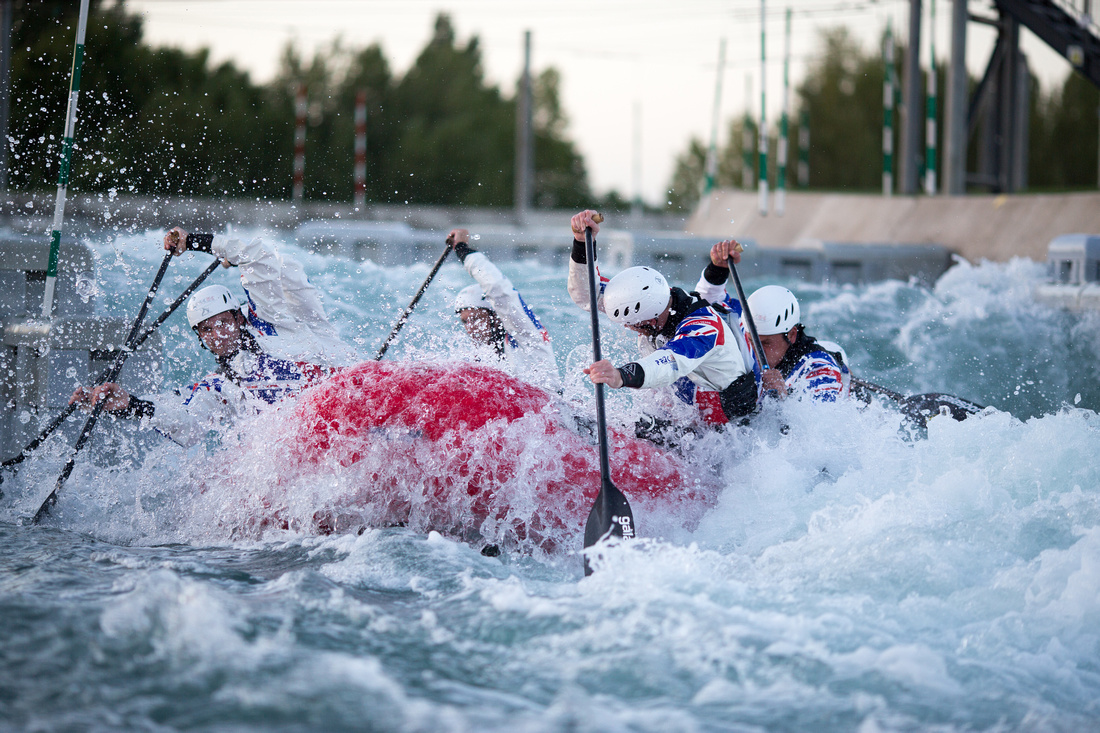
 I love this photo as it shows all of the team working in unison, when we were going through the shots post training the team captain (Dan) was drawn to the photos where all of the oars were in line and told me that this highlighted the fact that the team were working well together and that they were demonstrating good technique. It's little things like this that make me appreciate a photo for more than the drama it conveys as had I not been able to talk to Dan I would not have been looking for these qualities or appreciate the skill captured in my photo when selecting the final shots. This reminds me that whilst I know what I like to photograph, I need to consider what's important to the people in the photos and then try to strike a balance between the two.
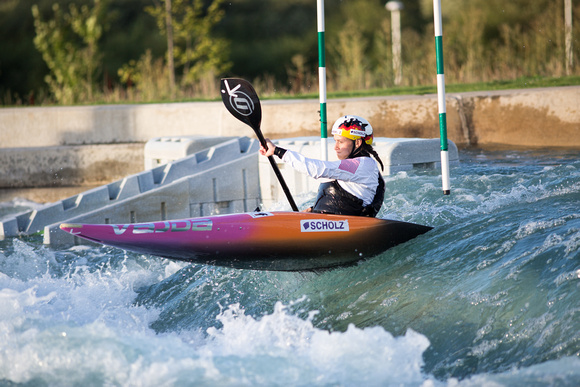
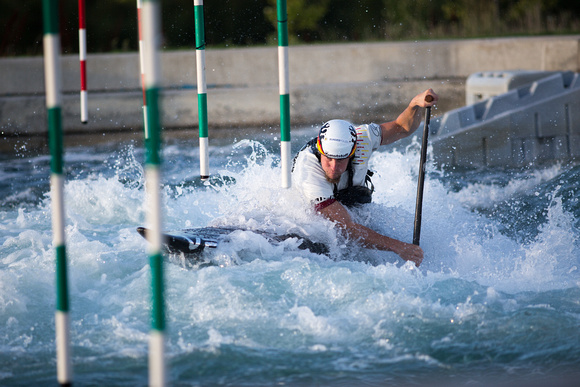
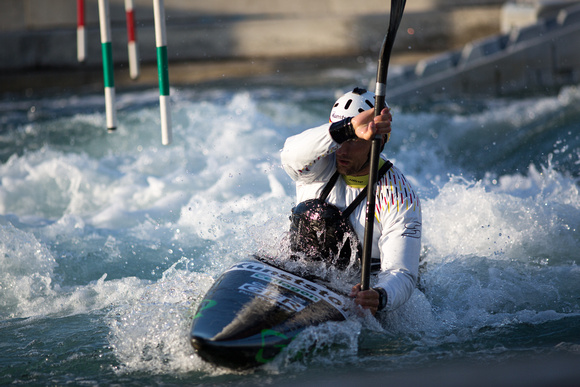 Prior to the training session I was able to take some photos of the German national kaiaking team, who were speeding around the course and making short work of the rapids. My time at the session was a very humbling experience as I was able to document athletes at the top of the game doing what they love and showing why they are among the best in the world in their respective sports. I would defy anyone not to have a real sense of pride when watching Team GBR in action, I know it was a real honour and a highlight from this year's photography for me.
 I'm sure you'll join me in wishing Team GBR good luck in the world championship and their future endeavours. Please see the full white water rafting gallery and the kaiaking gallery for more photos from this training session. Also please check out Team GB's Facebook page.
As usual please feel free to comment, I do read all of the comments and am grateful for feedback, your own stories and experiences or just observations that may spark a conversation about the posts I put up.
]]>
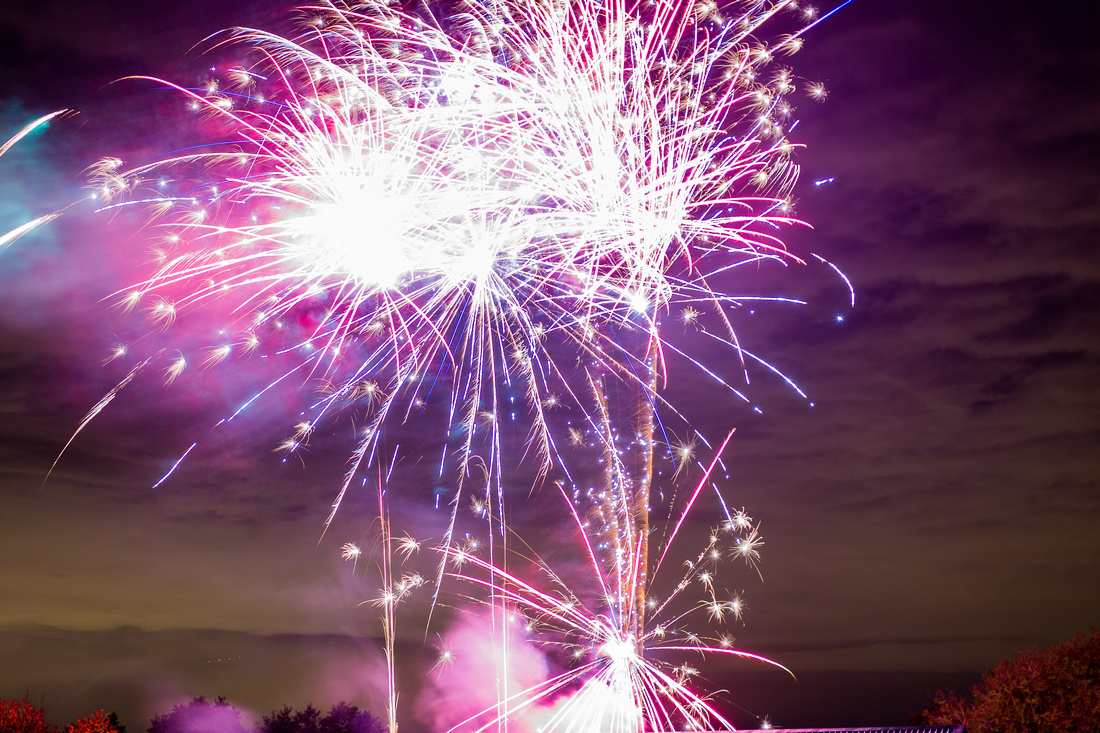
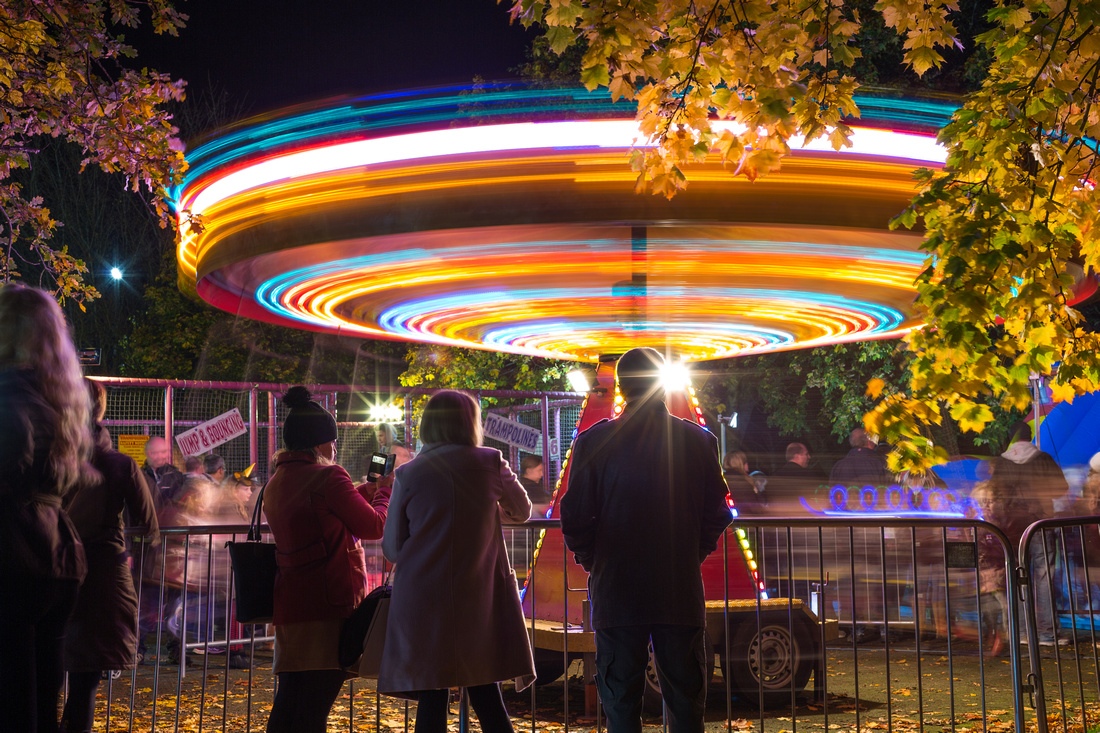 Bonfire night is fantastic for photography with all of the lights, sparklers, fireworks and people there is an abundance of subjects and opportunity for some stunning photos. However, it is also one of the most difficult occasions to photograph in and can often leave photographers feeling frustrated and underwhelmed as their photos come out blurry, overexposed, grainy or just out of focus. I have suffered from all of these issues and when a good friend of mine asked me this morning about the best settings to photograph a fireworks display that she was attending this evening, I thought I would write a blog to try and demystify the process of getting the shot in these conditions and share some photos with you that were taken at a recent display in Tunbridge last week.
 The first thing to note is that the displays are not just about the fireworks and provided people are ok with it, there are plenty of opportunities to take interesting shots of them enjoying the event. The above photo was taken in my role as the official photographer for the Round Table, who were hosting the display in a bid to raise funds to pay for a local junior football academy and also to furnish the parks of Tunbridge with static table tennis tables. The evening was successful in raising over £7000 for these causes which I feel proud to have contributed in a small way by documenting the event for future awareness raising. I would otherwise not advise that you take photos of random children without their parent's permission as this could end badly, this child actually won the fancy dress competition the previous year and her parents encouraged me to take some candid shots in anticipation of another win.
 However, she was up against some stiff competition this year.
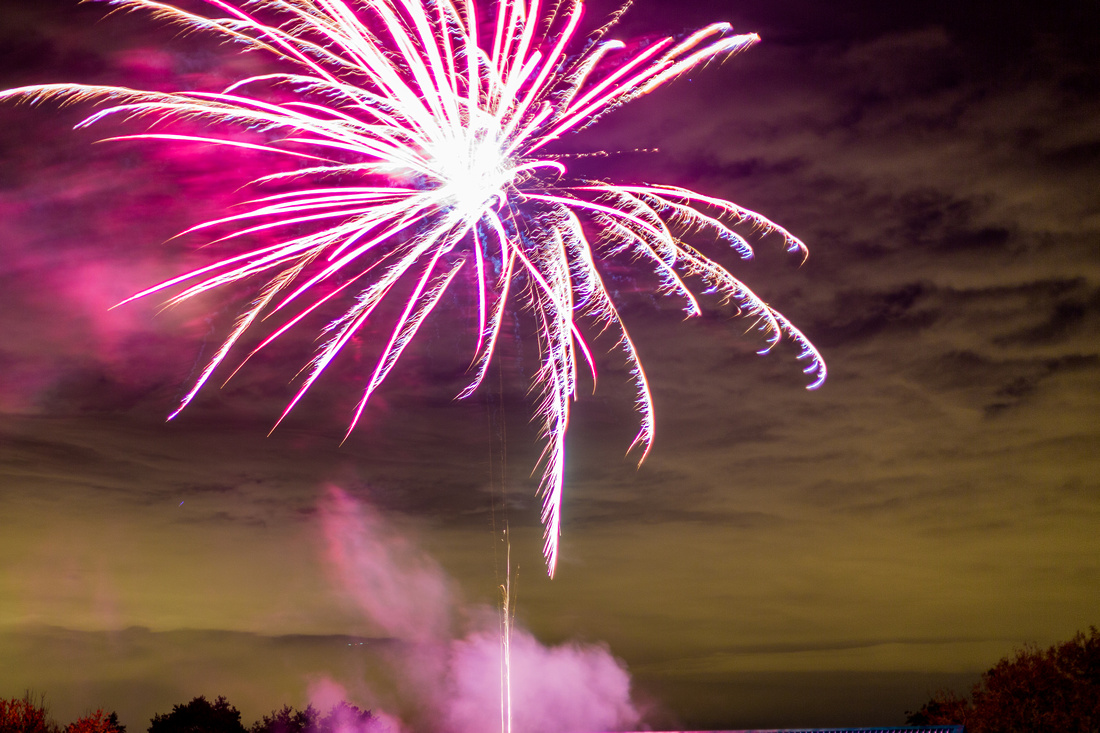 For all those out there hoping to get some photos of fireworks I am sure that there are hundreds of tried and tested methods and the ones outlined below are just what works for me and may not suit everyone, but I hope they will prove useful. So here are my steps to improving your chances of coming away with some great photographs from the display.
Use a Tripod
If you able to, using a tripod will greatly improve your chances of getting the photos that you want from the evening; this is for 2 reasons firstly, it's going to be dark and you'll want to keep your ISO to a minimum in order to reduce noise in your image, especially in the shadows and dark areas of the sky. By using a tripod you can use a longer shutter speed and keep the ISO down. Secondly I recommend experimenting with longer shutter speeds as these yield different results in the patterns that are created by the light trails of the fireworks, I personally use shutter speeds from 1 to 4 seconds, however, this is a creative choice and you will find a shutter speed to suit the look you are going to for. If you are not able to use a tripod, then all is not lost as you can use a wider aperture to increase the shutter speed without sacrificing too much by raising the ISO higher. If this is not possible then perhaps you can rest the camera on a wall, the floor or any other stable base whilst propping it up to frame the shot. I find a scarf, padded camera strap or rucksack work for me when I'm desperate.
Keep Focused
Your camera's auto focus system may not be up to coping with the dark conditions or the lack of contrast that is often a complication when trying to get these types of shots. My advise is to use a tripod as mentioned above and if your camera supports it, use back button focussing to lock the focus. From here provided you or the camera do not move, hence the tripod, then the focus should be accurate. For more on back button focussing check out this article from the Digital School of Photography, who are a great resource for amateur and professional photographers alike: http://digital-photography-school.com/back-button-focus/
If you are not lucky enough to be able to use back button focusing on your camera, then a great alternative in this situation would be to manually focus. Having nailed the focus you will no longer need to re-focus provided you keep your lens switched to manual focus.
Making it easier for yourself
Having set up the shot, hopefully on the tripod with everything focused correctly, you can take each shot by pressing the shutter button each time a firework sours in to the sky. However, you will need to be careful as you do not want to move the camera too much and throw off it's focus or create blur through camera shake. Therefore an easier solution would be to use a shutter release cable. This allows you to control the shot without touching the camera. Most shutter release cables come with the ability to have the button held down through a switch. In this instance all you need do is put the drive mode of your camera in to continuous shooting, consult your camera's manual or you tube for instructions on how to do this. When in continuous shooting mode with the shutter held down you can then leave your camera to keep shooting while you enjoy the show.
I Hope this post has proved useful and has dispelled some confusion around how to take photos of fireworks. Please comment if you have any questions and please share your photos it would be great to see how they came out.
]]>
 So it's bonfire night and I'm sitting alone in my new house with a glass of wine thinking about writing my first blog. I can hear the pat pat pat of the fire works outside and I feel quite cosy being indoors already having made my way through said glass of wine. I have had a plan to write a blog for a while now and have not committed to it for one reason or another, but the truth is that I have not known how to start a blog or what to write about. So I thought I would discuss the recents firsts that have I encountered that are mainly due to writing this blog and the time that I spent in the dominican republic a few weeks ago.
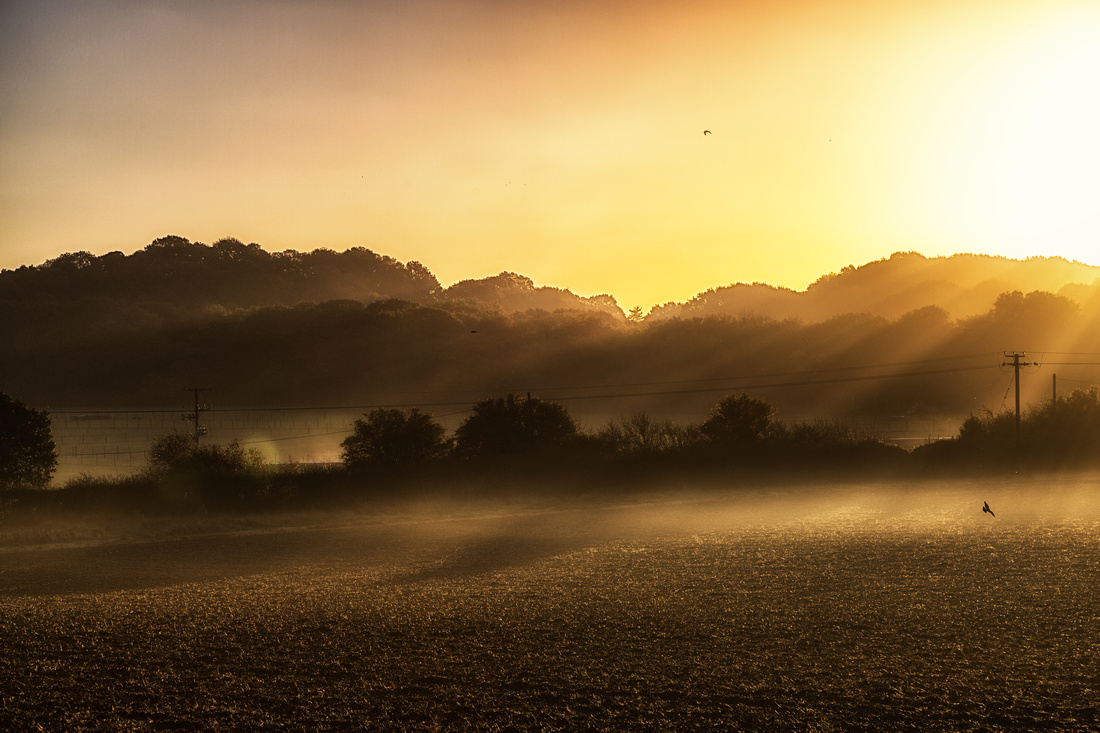
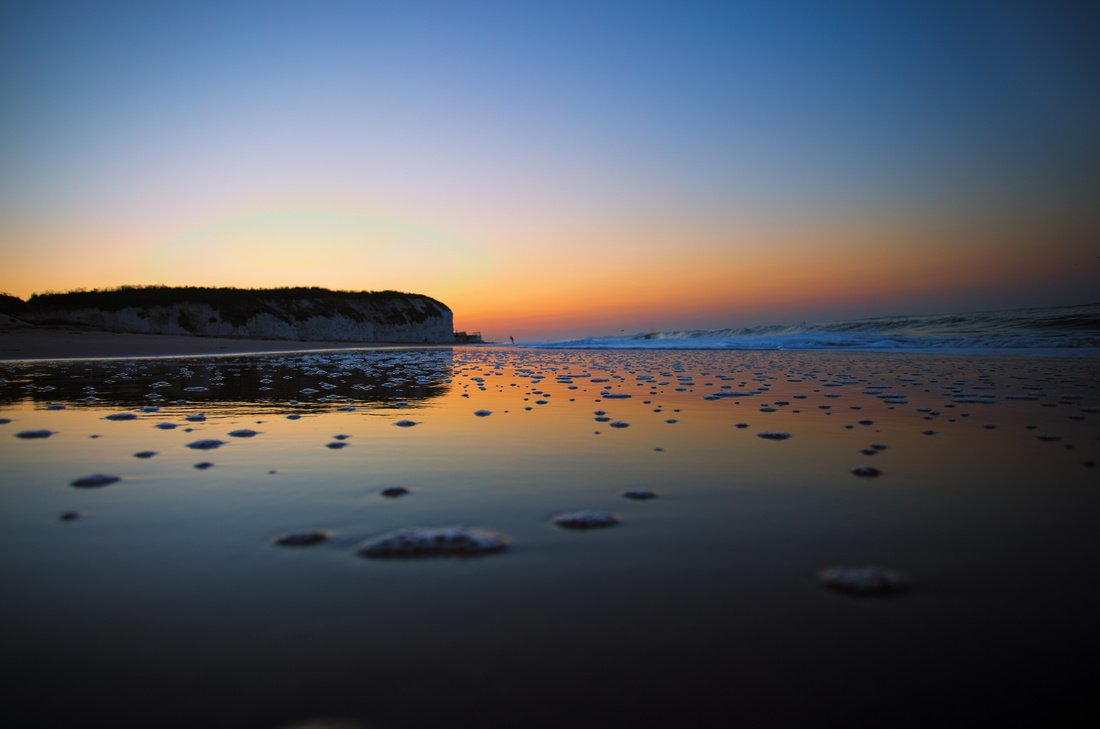
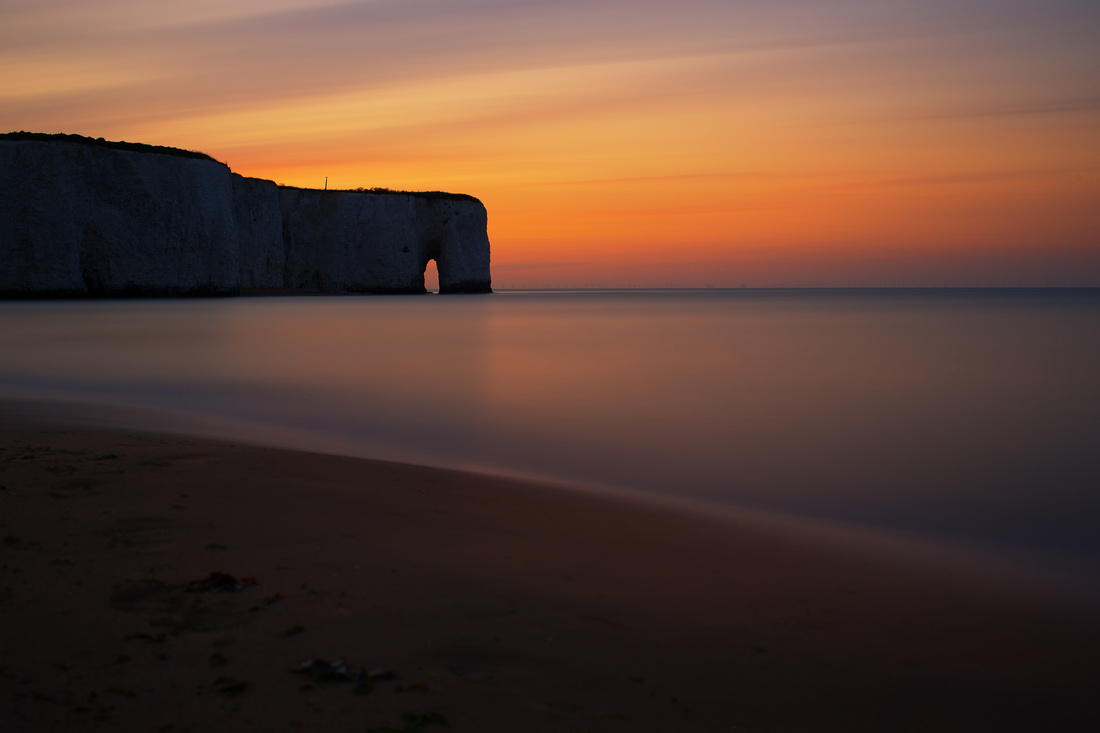
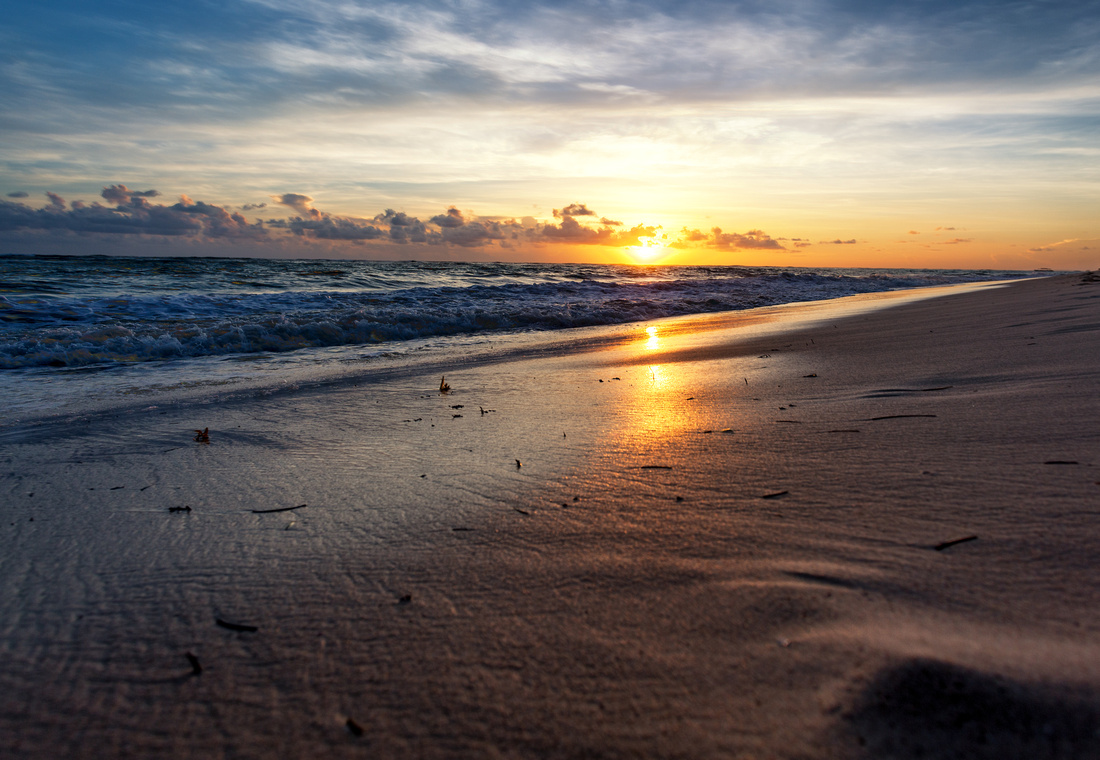 I stayed in Punta Cana, in the Dominica Republic, which was the first time I have set eyes on the atlantic ocean and this photo is the first sunrise that I have experienced in this part of the world. I stayed in a resort with a private beach that had stunning views and breathtaking vistas. I have to say that at 6:30 in the morning before the hordes of sun-worshipers, windsurfers, Kayakers and paragliders invaded the beach this was the epitome of paradise and sitting here now in my house where it is a mere 14 degrees outside, which lets face it is very mild for this time of year, I wish I was back on that beach. But you can't have everything and I'm grateful for the time that I spent there.

During my time in the Dominican Republic I like many people experienced a few "firsts" for example this was the first time I had sampled the local rum "Mamajuana" which is a brew of twigs, herbs and bark mixed with red wine and honey and it is very potent, in fact the locals blame their growing population on the consumption of this heady brew. However, they drink this stuff like it's water and encourage everyone else to do likewise. The crew of local excursions were foisting drinks on to unsuspecting tourists like it was candy and in the next breath were advising that people drink responsibly, however, there was a naive and laissez a faire attitude towards alcohol among the locals and whilst I had heard of the odd person who became ill through too much alcohol consumption. Most people were sensible and a good time was had by all.
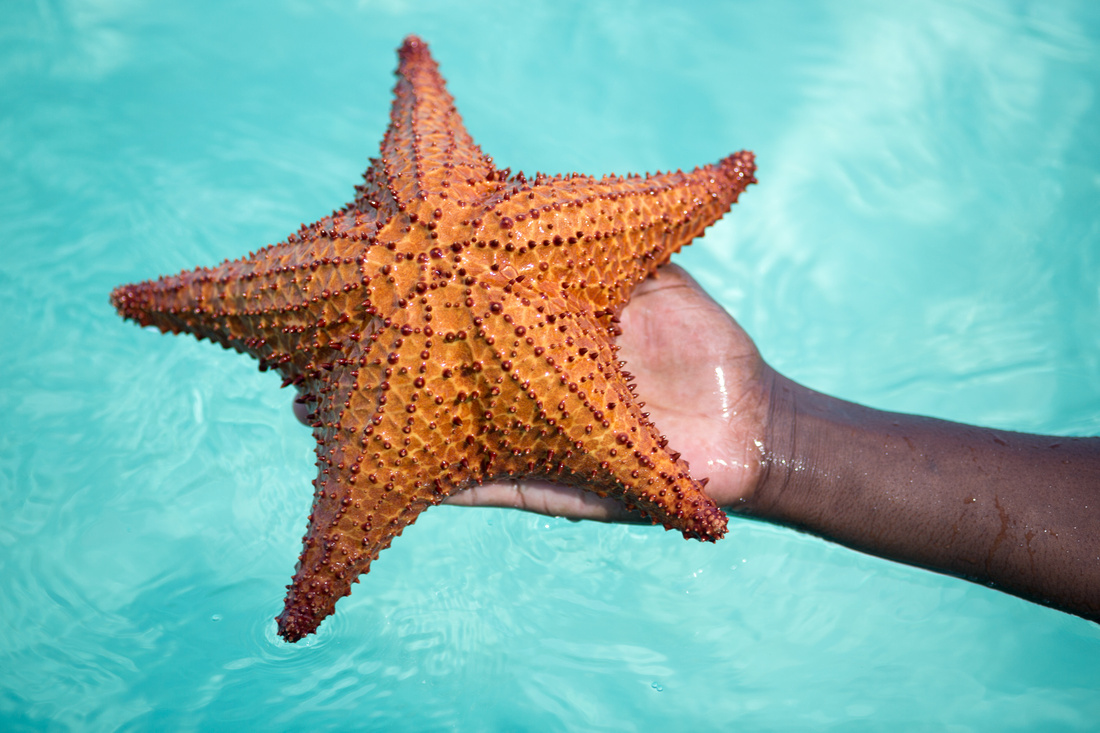
Another first which was a favourite for me was the first time I saw a live star fish. We took a cruise out to Saona Island, which is a national park made famous by film makers for films such as the Blue Lagoon and the Bounty Advert. I loved the fact that there were starfish living in the clear blue waters of the protected park. The island had a calm tranquility that was only spoiled by the number of tourists that would turn up on excursions to view the natural beauty in their droves every day. However, I am comforted by the fact that the island and it's ecosystem is protected by law in it's status as a national park.
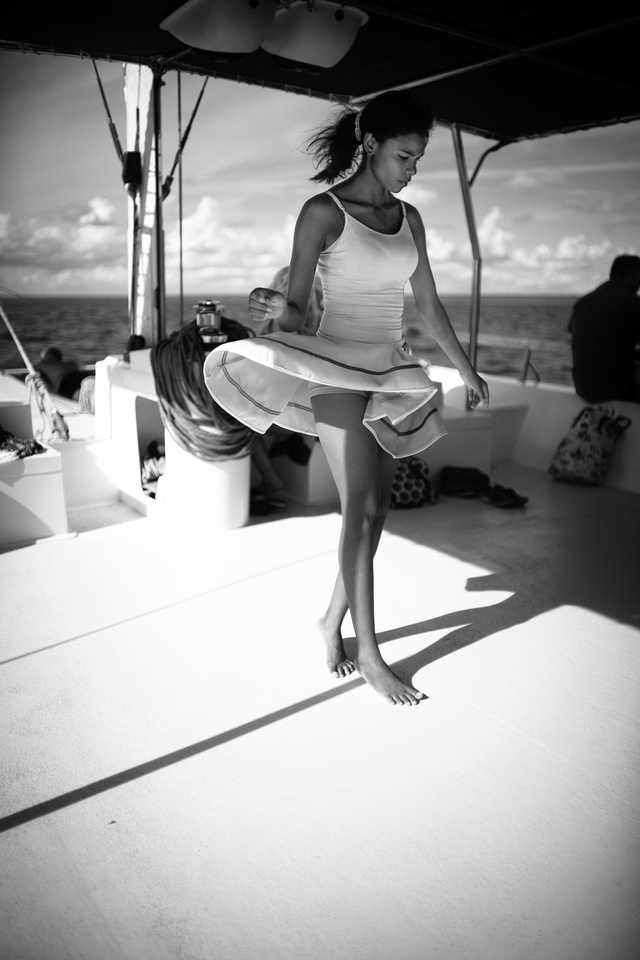
On the way back from Saona Island is where I had my first caribbean dance. I have to say this was not my finest or most graceful hour, however, Laura, my partner, enjoyed watching me flail around on the catamaran that was taking us back to Punta Cana. She did not try to intervene as she was having too much fun watching me awkwardly navigate myself around the dance space with an expert trying to show me the finer points of her caribbean moves. I am forever grateful for her belief in me but I will not be entering strictly come dancing this side of christmas, that's for sure.
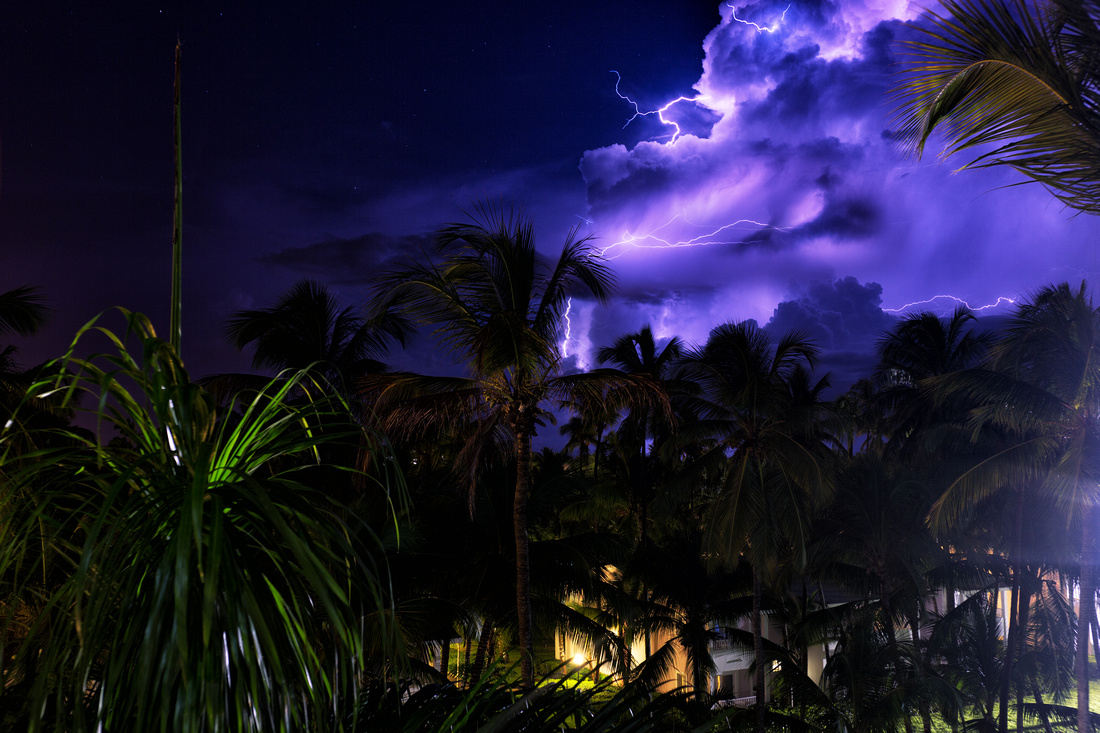
During my time in Punta Cana I experienced my first tropical storm, most nights for the first week. These were very regular electrical storms. In the main I was grateful as the heat at the time was unbearable when coupled with the high humidity. The storms would bring some welcome relief and provided an excellent source of dramatic entertainment. Laura and I would love to sit and watch the storms during dinner and later try to capture them on camera. Above is a good example of the type of scenes that we were regularly greeted with during our evenings in Punta Cana.


Another first for me was my first International Wedding. I was fortunate enough to be able to photograph the Wedding of Laura's brother and his betrothed. This was the first time I had been to a wedding outside of the UK and I was not sure what to wear as the weather was hot and humid and a 3 piece suit, not only felt wrong but would have been very uncomfortable. In fact some of the spectators were in bikinis and speedos so I felt rather smug as I had dressed up given that I was wearing Chino shorts and a white linen shirt. Ultimately though it was a fantastic day and I felt privilaged to be able to document and share the day with the lovely couple.
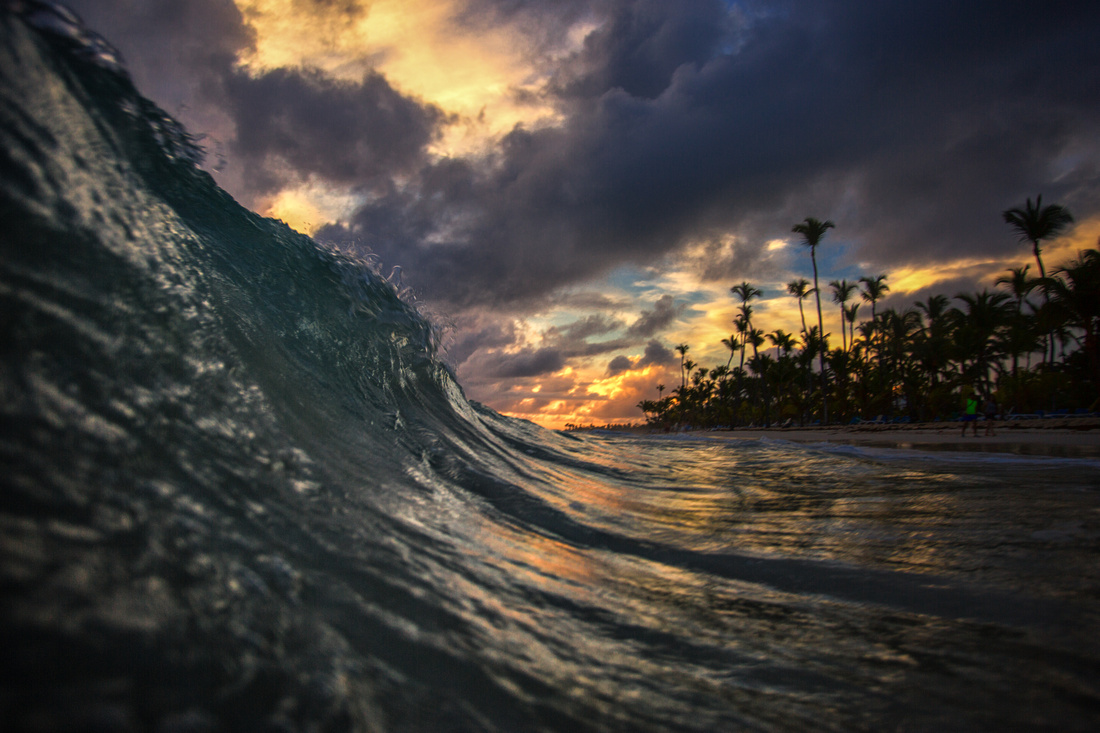
Prior to the wedding I was able to catch my first big wave, this was a bit of a disaster as I used a water proof bag to protect my camera which ended up splitting resulting in the bag taking on water and my camera spending 10 days in a bag of rice trying to get better. At the moment the poor little critter (camera) is still not well as it can only take one photo every 3 seconds any faster and it throws a fit resulting in me having to turn it off and restarting it. At least it had some adventure and I am hoping that with the right support it will be ok again soon, depending on my insurance company, fingers crossed they're understanding.
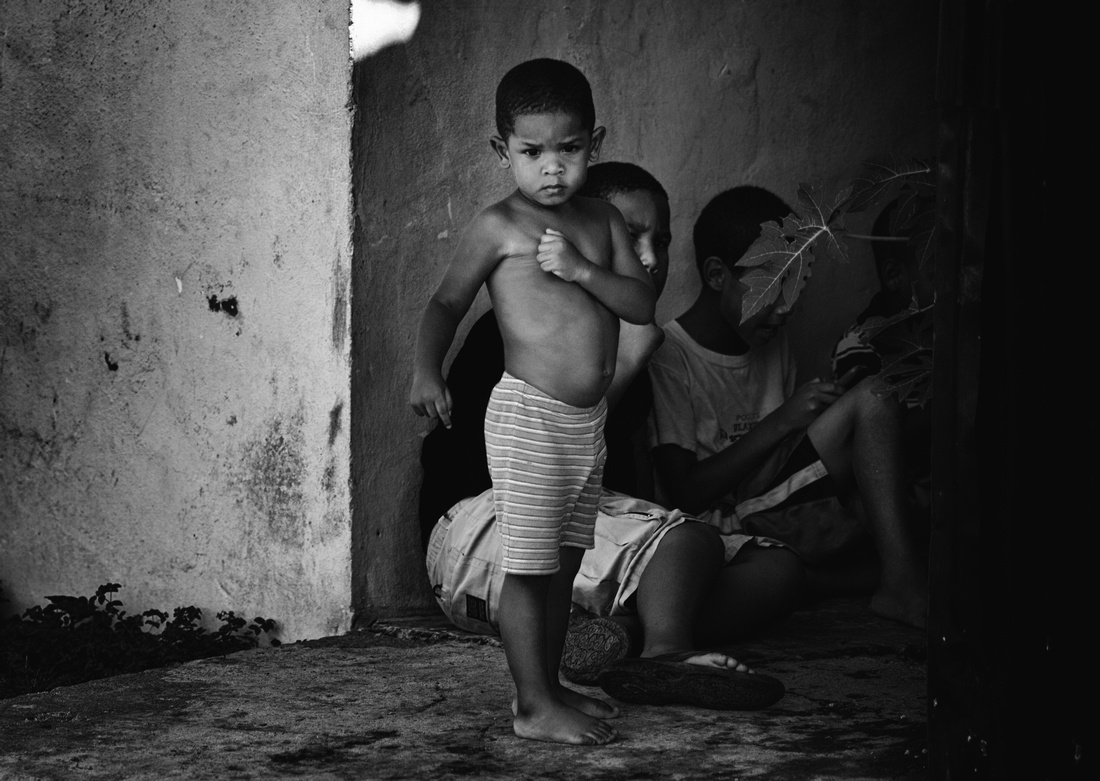
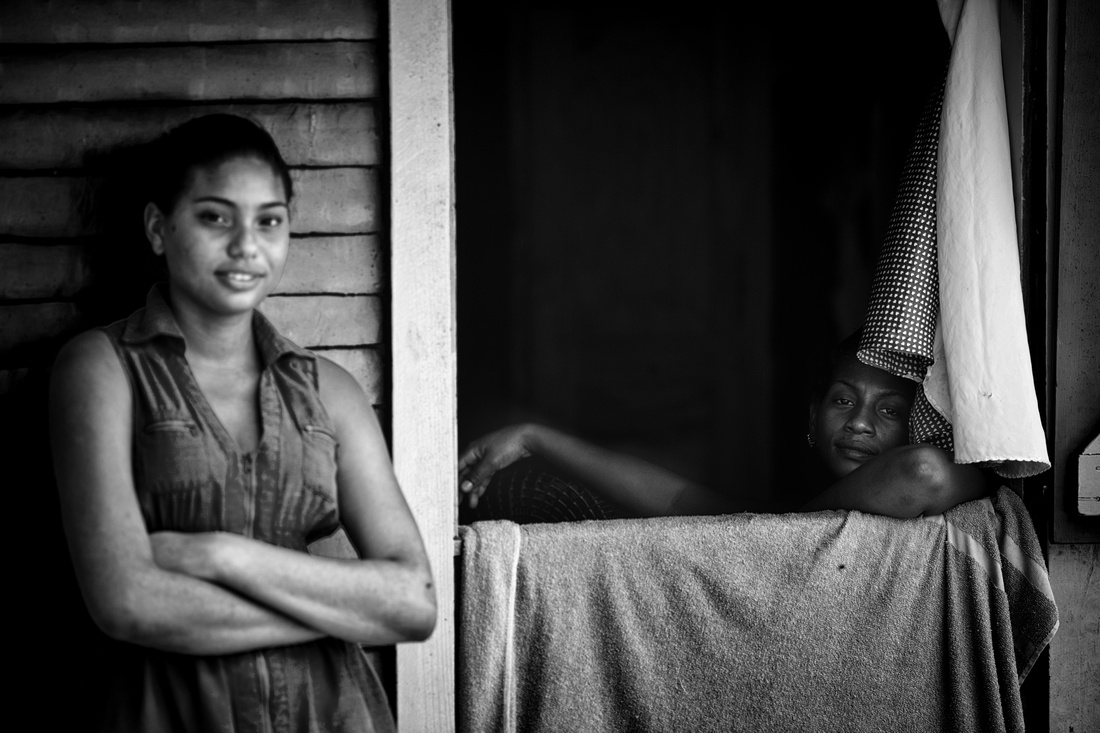
Along with the other firsts that I have recently experienced I got to meet the local people of Punta Cana who were very warm, welcoming and accepting of Laura and I. They were deprived, however, they were very happy at the same time. It made me question a lot about our values and how we measure success in modern life. I found that these people worked very hard for very little yet were able to live happy and fulfilling lives enriched with genuine affection and care for others and their families. Perhaps deprivation is relative and we can learn some lessons from their values and way of life.
I hope you have enjoyed my first blog please feel free to comment and I will attempt to respond quickly.
]]>